
Setting up a Pi-4b Gaming Rig – Part 1

Many of you know by now that Retro-Gaming has been a passion and hobby of mine since I discovered video games in the 70’s. Yep that’s right, there was gaming before Mario! That said, I was super excited to finally see a RetroPie Build specifically for the Raspberry Pi-4b which up until now the previous builds didn’t take advantage of the extra memory and architecture of the 4. I’ve been playing around with the build for a little over a month now, and thought I share how to build a gaming system of your own.
If you’re wondering, there’s definite performance improvements with the N64 Emulator before overclocking.
In today’s post, I’m going to walk you through the simple steps of building a basic Raspberry Pi-4 retro gaming rig using off the shelf hardware and have you up and running in no time!
What Do I Need?
Hardware List
| Item | Link | Approx Cost |
|---|---|---|
| Raspberry Pi-4 Starter Kit, The 2Gb Model is more than adequate for this project. | https://thepihut.com/products/raspberry-pi-starter-kit | £59 |
| Aluminium Armour Heatsink Case. | https://thepihut.com/products/aluminium-armour-heatsink-case-for-raspberry-pi-4 | £12 |
| 8Bit Do SN30 Pro+ Controller | https://www.amazon.co.uk/Bluetooth-Wireless-Controller-Raspberry-Detachable/dp/B07YCFY8WM/ | £40 |
| Optional Keyboard | https://www.amazon.co.uk/Arteck-Ultra-Slim-Bluetooth-Compatible-10-2-inch-Black/dp/B07V5LWSN5 | £16 |
| Optional Mouse | https://www.amazon.co.uk/TeckNet-Bluetooth-Adjustable-Wireless-Cordless-Black/dp/B07GQXNG4F | £14 |
| Micro SD Card | https://www.amazon.co.uk/SanDisk-microSDHC-Memory-Adapter-Performance/dp/B073K14CVB | From £6 |
| Approximate Total Cost | £147 |
You may have one or more pieces of hardware you could reuse for this, for example, if you have a power supply and appropriate HDMI Lead, you’ll only need the Raspberry Pi-4b. I found that the 2Gb model is more than sufficient based on the current RetroPie build.
From April 2020, the RetroPie team have released a Pi-4 specific build which includes a number of patches and enhancements. Although still in Beta stage it is the first “Official” image to be released. In case you’re wondering, I have an 8Gb Pi-4 and there’s no discernible performance difference between the 2Gb model and the 8Gb model when using the software out-of-the-box.
Why are the Keyboard and Mouse are optional? Most of the time you can communicate with the Pi using a Terminal Program, like PuTTY or Linux SSH command over WiFi or Ethernet connection and therefore one isn’t needed. However, if you’re planning on playing old school retro-games from machines like the Commodore 64, ZX Spectrum and Amstrad CPC then you will need a keyboard at a minimum. Atari-ST and Amiga games will need a mouse.
I’ve used Bluetooth Mice and Keyboards for various RetroPie projects, USB Keyboards and Mice are just as usable and easier to configure. For the purpose of this article, I’ll be using wireless throughout.
Software List
| Software | Link |
|---|---|
| RetroPie | https://retropie.org.uk/download/ |
| Balena Etcher | https://www.balena.io/etcher/ |
| PuTTY (Windows Users) | https://www.chiark.greenend.org.uk/~sgtatham/putty/latest.html |
| 8Bit Do Firmware Upgrader Tool | https://support.8bitdo.com/firmware-updater.html |
| extFS by Paragon (Optional) | https://www.paragon-software.com/home/linuxfs-windows/ |
| Official SD Card Formatter (Optional) | https://www.sdcard.org/downloads/index.html |
When downloading the RetroPie Image, be sure to select the build for your Pi Version, and I do recommend the Pi-4 Build since fixes have made configuring this up relatively straight forward out of the box!
Optionally, I found that using ExtFS from Paragon Software https://www.paragon-software.com/home/linuxfs-windows/ useful for writing to the Linux Partition natively using Windows or MacOS platforms. This speeds up the process of transferring game images to the SD Card than using your network for connectivity.
It’s worth noting, the Aluminium Armour Case I’m using does affect the WiFi Signal somewhat, it’s best to place the Pi somewhere with fewer obstructions to your router (or alternatively use a wired ethernet connection).
Let’s Do It!

Align the Heatsink 
Bolt it Down
Enough pre-amble, lets crack on with it! First add the heatsink case to the Pi, the Armour Case has a thin layer of plastic protecting the sticky pads that will attach to the CPU and components that generate the most heat.
That’s the easy bit done! If you haven’t already, install Balena Etcher to your Windows/MacOS machine, and download the Raspberry Pi-4 RetroPie Image https://retropie.org.uk/download/

Etcher Ready to Flash 
Admin Password may be Required 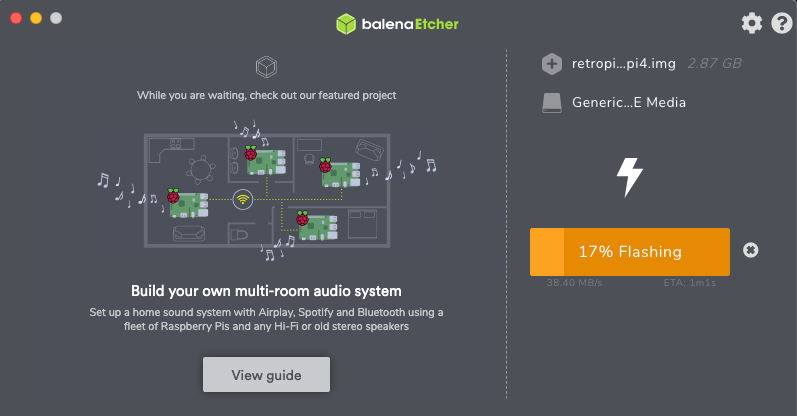
Flashing the SD Card 
Validating the Image 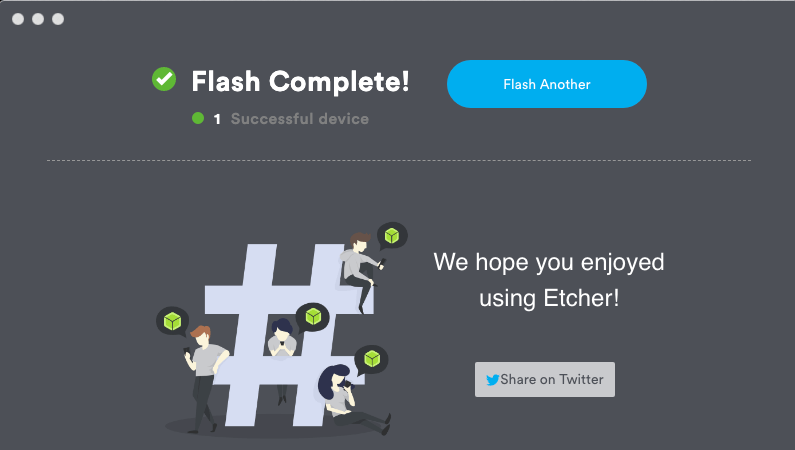
Success! Card is Ejected Automatically
Follow Etchers instructions to flash your Micro SD Card, the process takes a couple of minutes, before the image is verified. If successful, the card is automatically ejected from your device and you will need to physically take the card out and put it back in your device again.
Although the image is less than 1Gb, when booting for the first time, the partition will be resized to use the full volume of the card.
If the SD Card failed to image, you may have a faulty card or you may need to reformat the card. I found that on macOS I couldn’t remove the partitions from the card and therefore you may need the official SD Card Formatter to reset the SD Card, found here https://www.sdcard.org/downloads/index.html
When you re-insert the card into your device, you may see only one volume called “boot” this is the main OS image that is required and is formatted as MS-DOS FAT 16, if you don’t have a driver to read Linux extFS partitions, you will not see the additional partition created with the RetroPie software. Although not essential, I do recommend finding a suitable driver or purchase the Paragon software to enable reading and writing Linux extFS partitions as it will make customising your build much easier in the long term.
Video
Enable SSH and WiFi
Re-Insert your SD Card to your device as you will need to create two files to enable SSH and WiFi connectivity. If you are a Windows User, Skip Here
macOS
Start a Terminal Session (⌘ + SPACE) and Type “Terminal” and hit return.
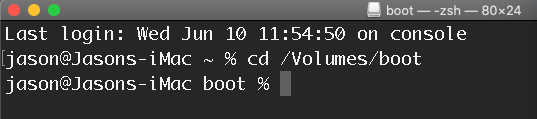
At the command line, type (case Sensitive)
cd /Volumes/boot
You will need to create an Empty File called SSH that will act as a flag to enable SSH.
touch ssh
ls -al ssh

You’ll find an empty file create on the SD Card, which you can check using Finder.
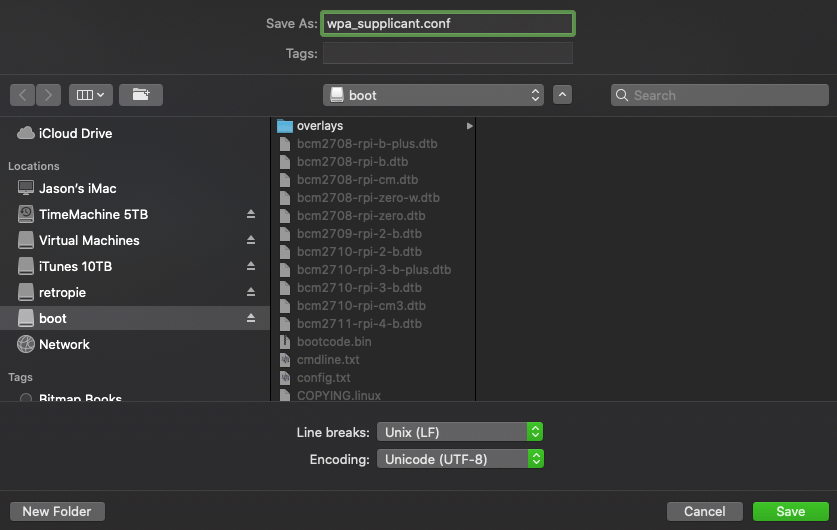
Next you will need to create a file called wpa_supplicant.conf which will contain your WiFi configuration, use your favourite Text Editor to do this, Ideally save the file as Linux and not Windows CR/LF text format.
country=GB
ctrl_interface=DIR=/var/run/wpa_supplicant GROUP=netdev

#RETROPIE CONFIG START
network={
    ssid="YourNetworkName"
    psk="YourWifiPassword"
    key_mgmt=WPA-PSK
    scan_ssid=1
}
#RETROPIE CONFIG END
Save this into the root directory of the SD Card

Now you’re ready to move to the next step.
Windows Users
Using Windows Explorer (Windows Key + E) to find the drive letter assigned to the “boot” partition of the SD Card. In my case, this is the S: Drive.

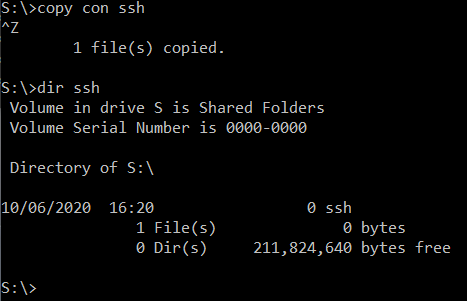
We need to create a blank file in the root of this drive called “ssh” which acts as a flag to enable SSH Services. Start a command prompt by clicking the Windows Logo and type CMD you should see something like this :-

Just click on the Command Prompt (you don’t need to run as administrator for the following tasks), and type the following commands.
S:
DIR

Obviously substitute “S:” with the correct drive on your system. Since Windows doesn’t have a native “touch” command we need to type the following, where you see ^Z replace this with the CTRL+Z keyboard combination and hit Return :-
copy con ssh
^Z
Alternatively you could use the following command :-
fsutil file createnew ssh 0

Next you will need to create a file called wpa_supplicant.conf which will contain your WiFi configuration, use your favourite Text Editor to do this, Ideally save the file as Linux and not Windows CR/LF text format.
country=GB
ctrl_interface=DIR=/var/run/wpa_supplicant GROUP=netdev

#RETROPIE CONFIG START
network={
    ssid="YourNetworkName"
    psk="YourWifiPassword"
    key_mgmt=WPA-PSK
    scan_ssid=1
}
#RETROPIE CONFIG END
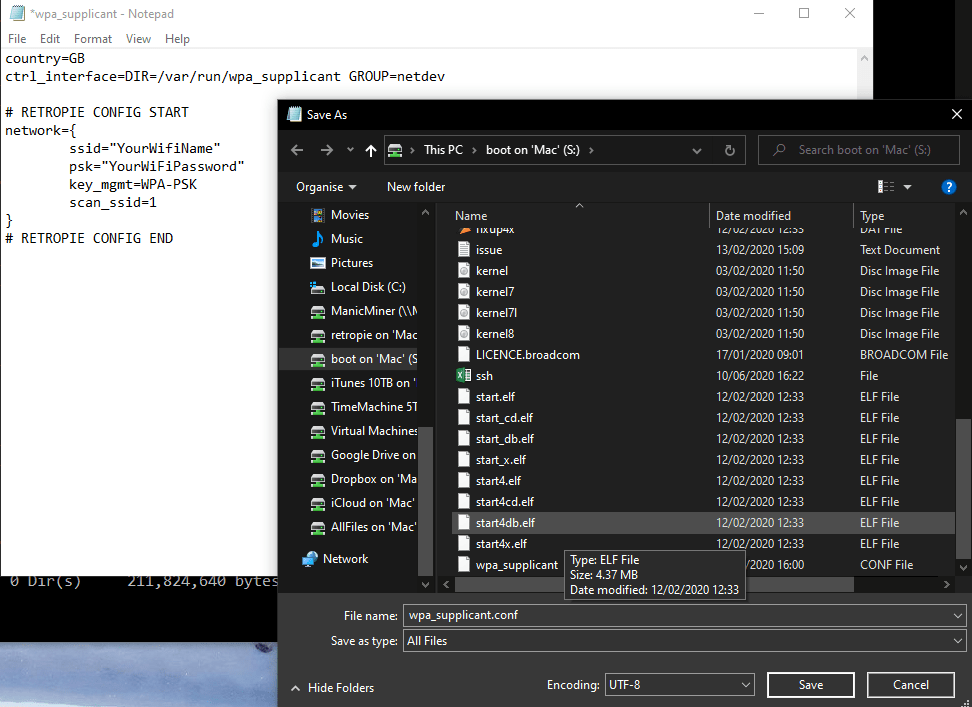
That’s the two files we need to create on the Boot partition of the RetroPie Build.
The config.txt file
Depending on the make and model of your HDMI TV/Output you may see a black border, if you you will need to open and edit the config.txt file on the root partition, and look for a section that has the following :-
# uncomment this if your display has a black border of unused pixels visible
# and your display can output without overscan
#disable_overscan=1
Simply uncomment disable_overscan The config.txt file contains a host of parameters that can be adjusted for the display and audio hardware that you’re using, but this should, be all we need to edit for the time being.
Updating your controller Firmware
If you’re using a control from 8Bit Do like the one I recommend in this article, chances are the firmware will need updating, so lets get this out of the way. Download the 8BitDo Firmware updater tool (or your particular controller type) and install and run on your device. Using the USB-C Cable connect the controller to a free USB port and switch the controller on. When the software finds the controller, it will check if the firmware needs an update. Full instructions are included here, https://support.8bitdo.com/firmware-updater.html
It is important that you are running Firmware 3.01 or above for the Raspberry Pi.
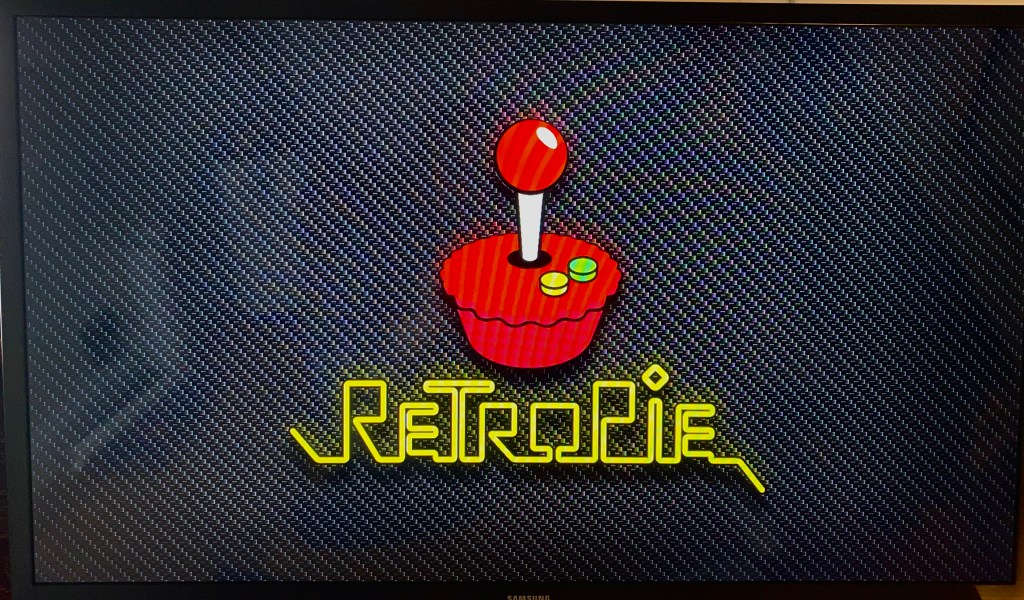
Fire it up!
Phew… finally it’s time to fire up the RetroPie, and the moment you’ve been waiting for… Safely eject the SD Card from your device and insert it into the Raspberry Pi. The card will only go in one way, so don’t force it.

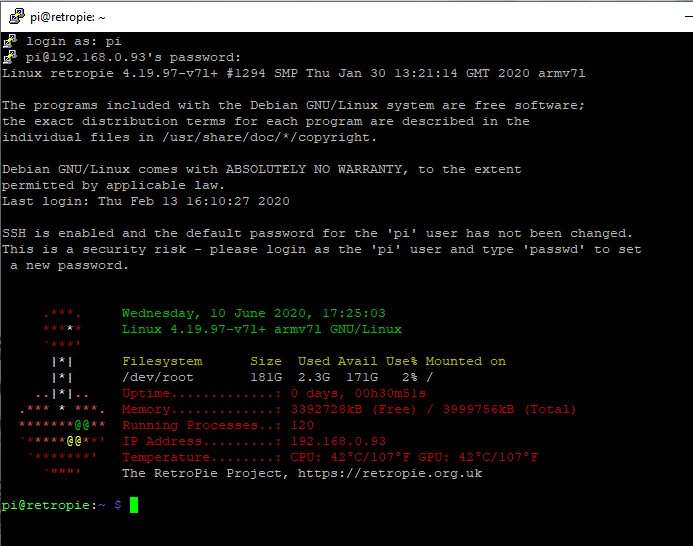
Connect the HDMI cable and Power and it’s time to fire up the Pi. Note it will take a while to start on the first go as it will resize the disks and perform various initialisation functions, on the second boot keep an eye on the text as it flys by to capture the IP address it connects to on your home network. (if you have a wired keyboard, this won’t be necessary, we will need it to configure bluetooth keyboard, mouse and controller. Looking at the messages whizzing by, I note the IP address assigned (assuming you have correctly entered your WiFi Network Name and Password) as 192.168.0.93 which I will use to connect to the Pi using SSH or PuTTY, this IP address may be different for your project, you will need to use your IP address.


Connect using macOS
Using macOS, start a Terminal Session and enter the following command, using the default password raspberry
ssh pi@192.168.0.93

Connect using PuTTY on Windows
Connect to the Pi using the IP address for your device, and on the first time connecting you will see a message with a host key, this is normal, and you can hit Yes to trust the device.
The user name and password are the defaults :-
login as: pi
password: raspberry


Connecting Bluetooth Devices
If you haven’t connected using a USB Keyboard, then you will need to configure the Pi to connect to your devices. RetroPie boots to Emulation Station by default, and without a connected keyboard this may seem difficult at first. This is one of the reasons for connecting to the command line.
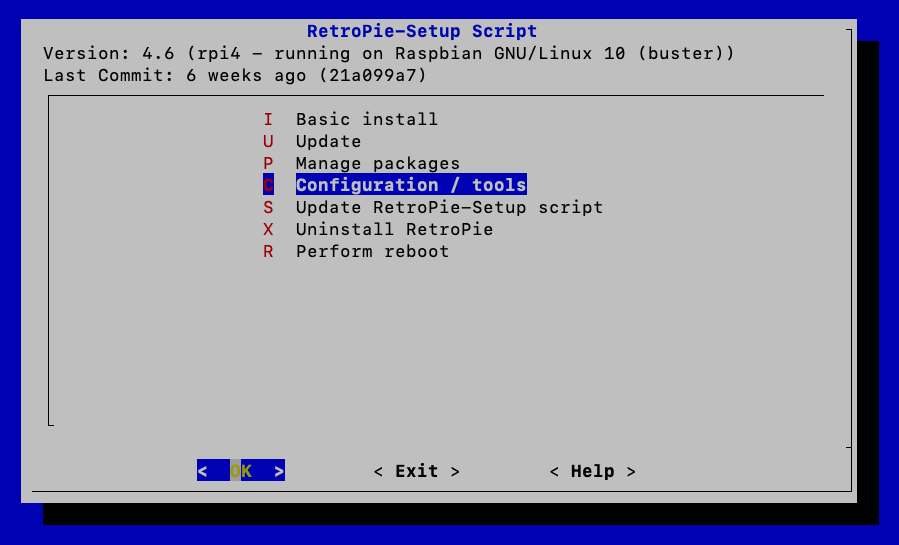
From the command prompt, enter the following commands :-
cd RetroPie-Setup
sudo ./retropie_setup.sh
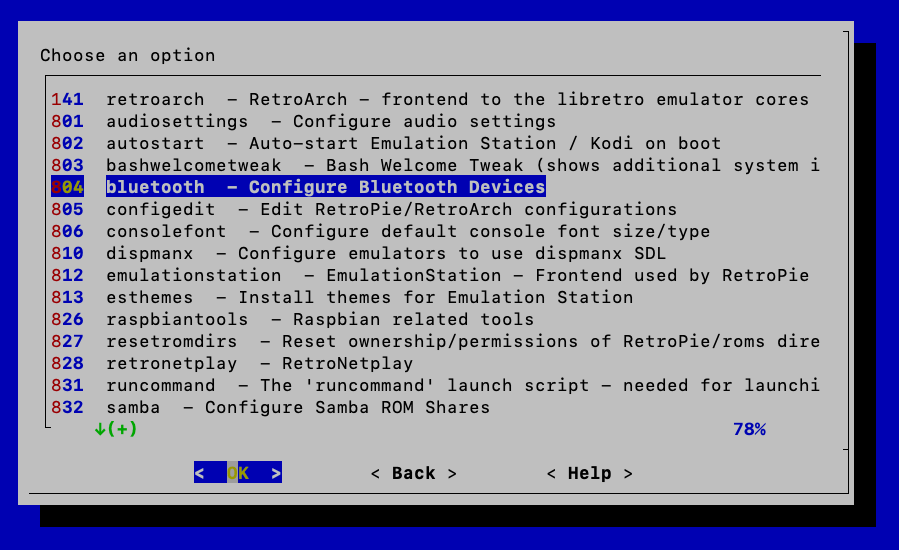
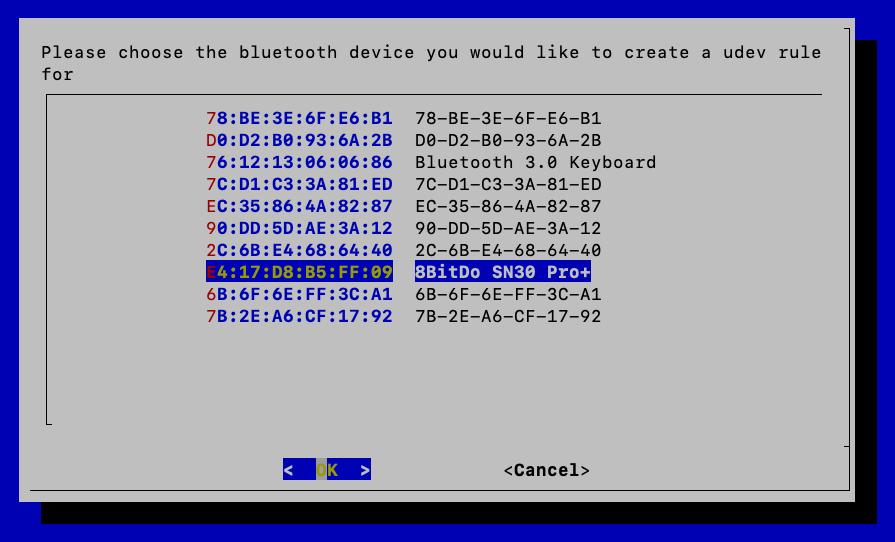
The first time may take a short time to start, however you will be greeted with the following screen shots. You may need to follow the instructions on your keyboard and mouse to start pairing mode. If you are using the 8Bit Do SN30 Pro+, I’ve set this into X-Input/Windows Mode by pressing Start + X button simultaneously, before pressing the SYNC Button near the power port.
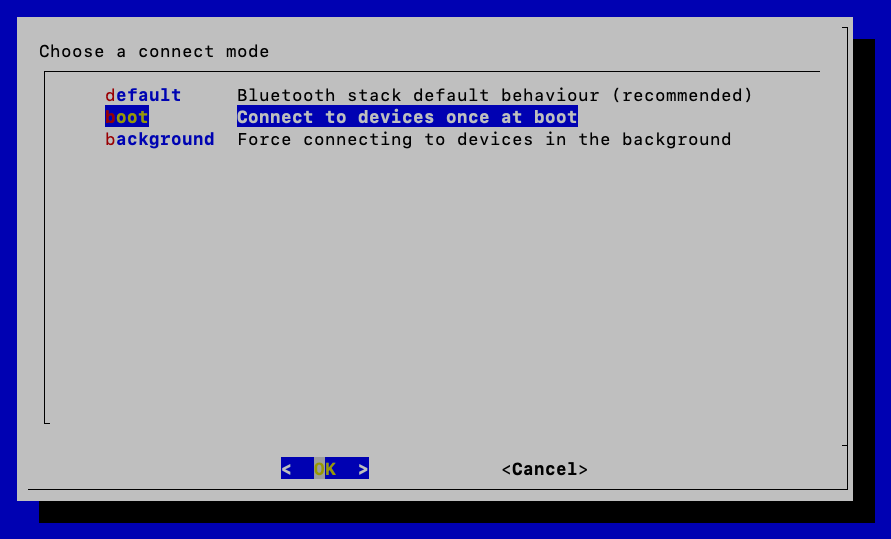
After lots of experimenting, I found that the Bluetooth connection mode worked best when set to BOOT rather than Default as this allowed the controller to reconnect more reliably on restarts, or screensaver mode. I’m unsure if that’s a bug with the build. In addition, you will need to set a udev rule up for the 8Bit Do controller. Sounds complicated? It’s fairly straight forward and the screen shots below will take you through the configuration process. Just repeat for each bluetooth device you want to connect, or in some cases, it may only be the controller as you won’t be playing keyboard games.


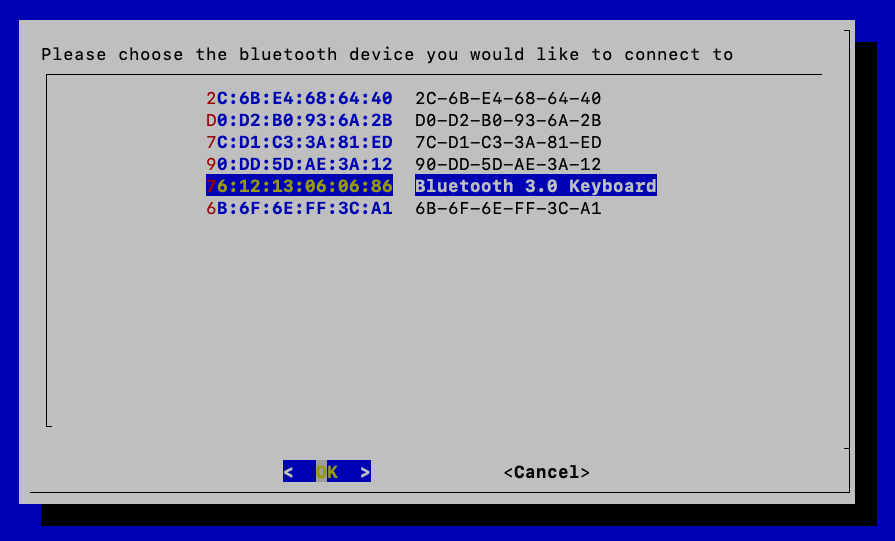


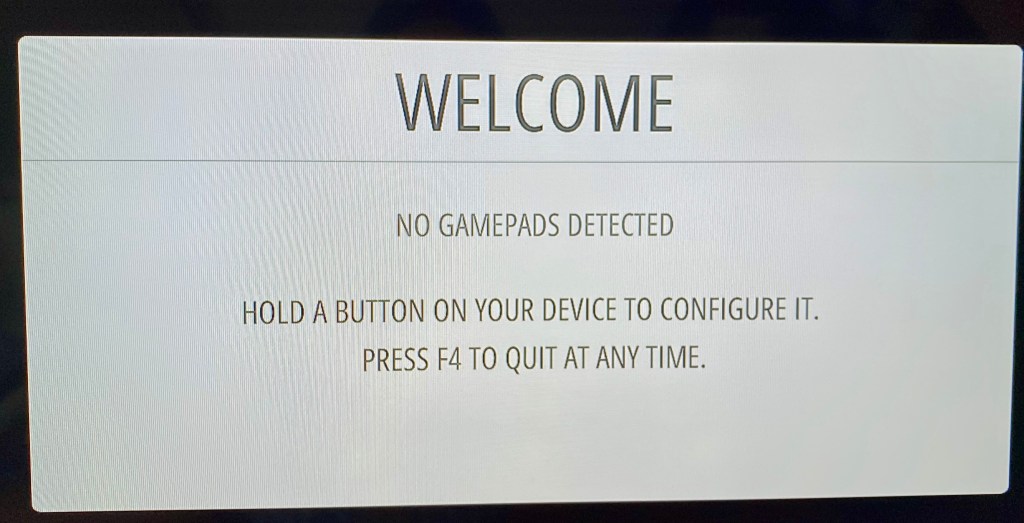
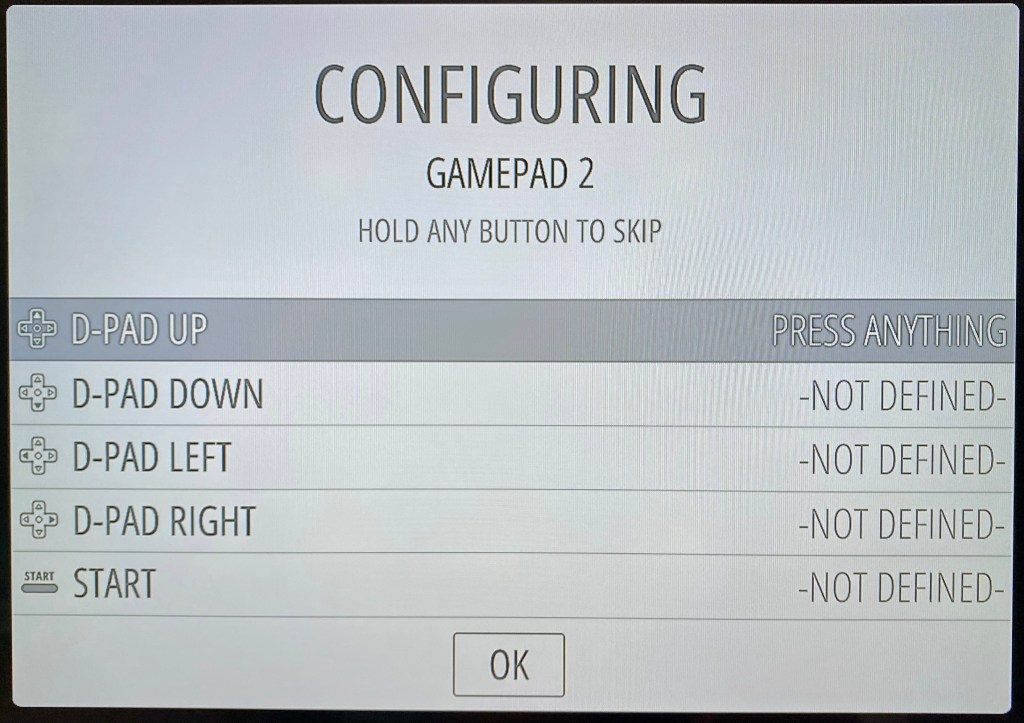
Phew, that’s a lot to take in, however, you’re almost there! The final stage for is to configure the games controller with Emulation Station, which is the Welcome Screen.
With the controller paired, hold down any of the controller buttons and follow the on-screen configuration prompts.


Help, I’ve misconfigured my controller!
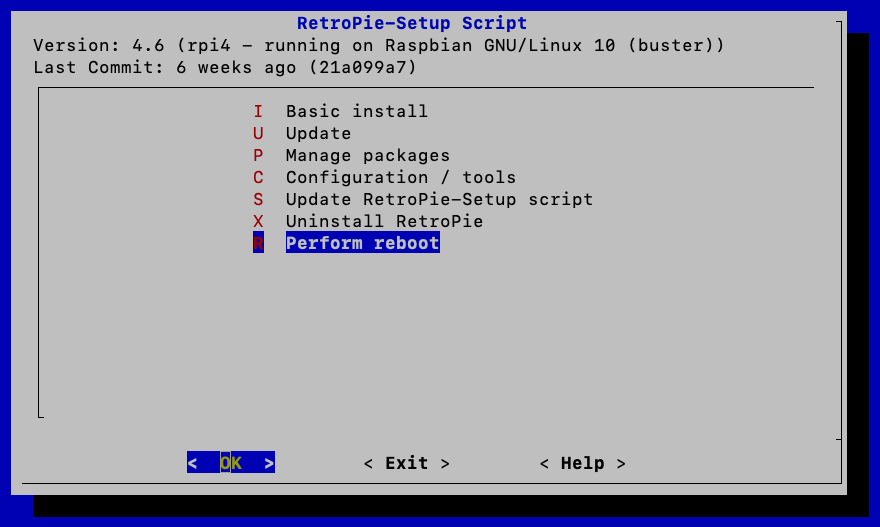
Don’t worry, we all do it from time to time, or maybe you want to swap controllers having upgraded. Well this is a simple task. Using the instructions above, start up RetroPie-Setup script and navigate to Configuration/Tools –> 812 – Emulation Station -> Clear/Reset Emulation Station Input Configuration


Installing Games to your RetroPie System
The main work is now complete, and you should have a fully configured RetroPie gaming system… But wait… where are the games?
You’ll need to install and download “Roms” to your Pi System and I have this covered for you in an earlier blog post here: https://muckypaws.com/2020/04/07/install-games-roms-to-your-retropie-build/ the instructions in this article are the same for installing your games list. I won’t be providing you with a set of Roms, there’s plenty of resources in the internet that can help with that, however this article keeps everything legal.
There are controls to note.
Pressing Select + Start whilst playing a game will take you back to the Emulation Station Menus, you should always
If you liked this, why not consider subscribing to my Blog or YouTube Channel, or if you’re able to help, make a donation to help me continue my efforts, details at the top of the page.
Thanks for stopping by and good luck with your retro-gaming projects!


1 Comment »