
3D Printing – 3D Touch
Manual bed levelling will get you so far, and in the perfect world (if we’re perfectionists), it may be all we’d ever need. For the rest of us, there’s a simple solution to improving your first layer results, especially if you have an uneven bed (for whatever reason), and that is to install a 3D/BL Touch Sensor to your printer.
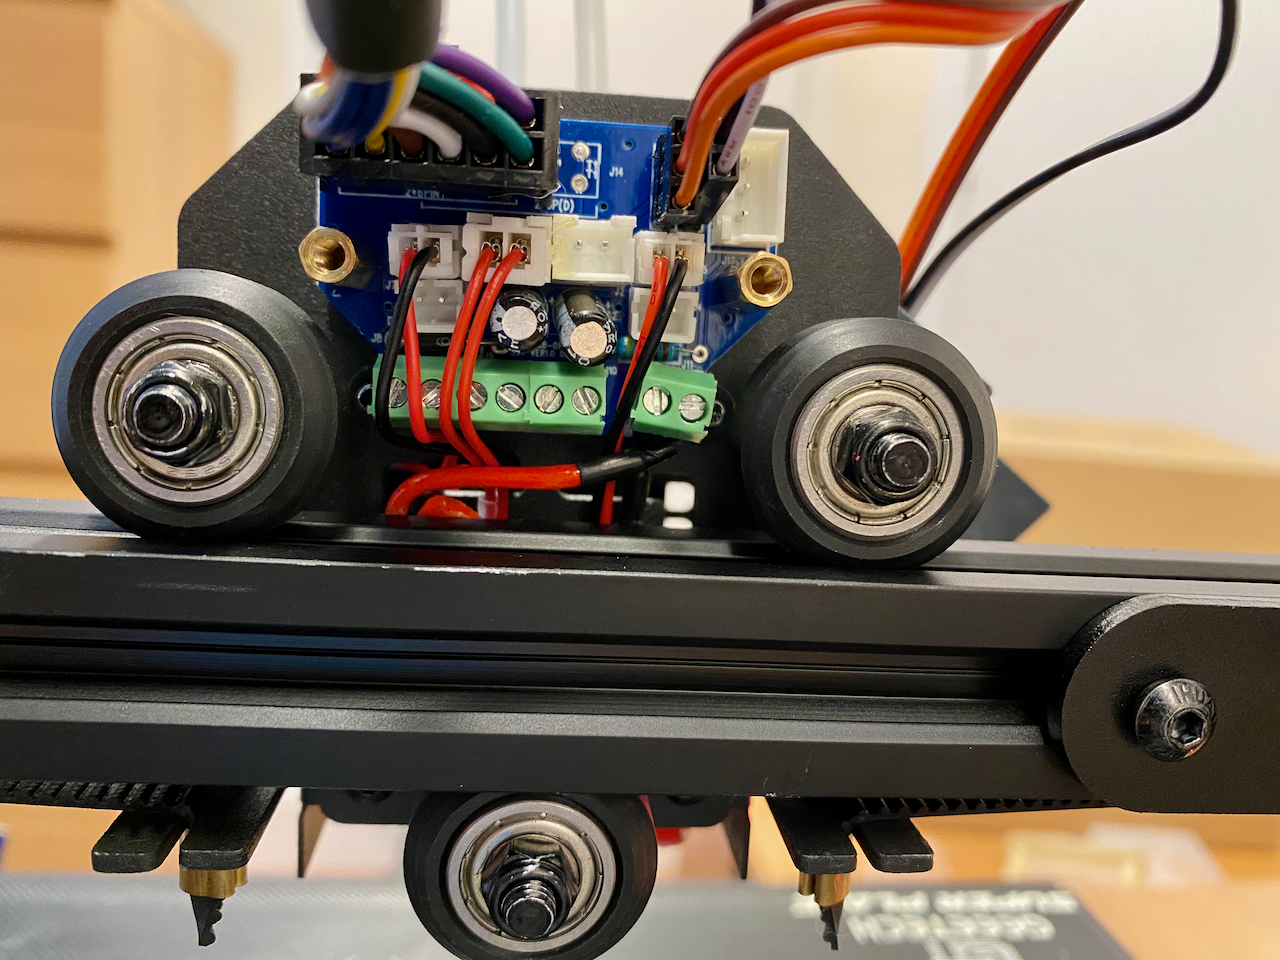
Having a Geeetech A20M, I went for the official 3D Touch, which I’m told is a copy of the BL Touch sensor. The main difference I can see is one has a metal probing pin, the other plastic.
Installation can be a bit tricky to get right, the official video simplifies the process for you. After Installation and Before switching your printer back on, the Firmware will need updating!
Here’s the official Geeetech Video which is handy when you know what you’re doing, in my case, I’ve included a video that goes through the process at a slower pace for the rest of us.
Firmware Updates
Geeetech Printers have different hardware driving the same model of printers. I’m using H/W 3.2 based on the GT2560 Arduino board. H/W 4.1 uses a different firmware so ensure you download the right version for your printer. If in doubt check with your printer manufacturers support channel.
The firmware is available from the official Git repository https://github.com/Geeetech3D/Prusa_I3_3Dprinter Don’t worry, the printer is based on the Prusa I3 series of printers.
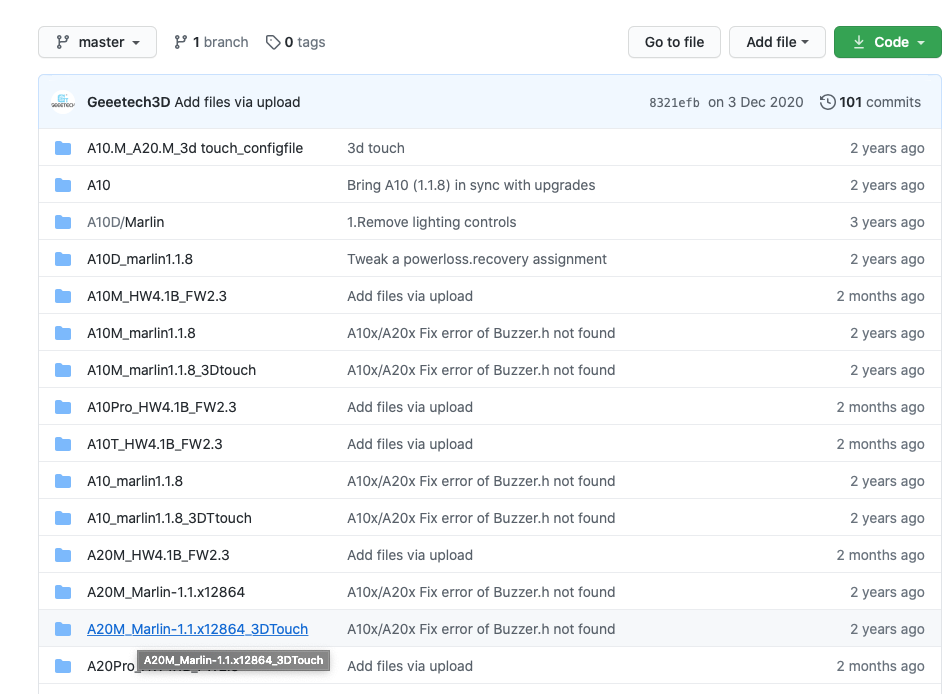
Download the entire package as a Zip file and extract the Specific Firmware for your printer (Mine required: A20_Marlin-1.1.x12864_3DTouch). The latest official for the A20M is Marlin 1.1.8 (You will see the version on power up the printer).
To compile your own firmware you will need to install the Arduino IDE https://www.arduino.cc/en/software which is free, or you can use Visual Studio Code with Platform IO. For this, I’m using the Arduino IDE since I’ve been playing around with Arduino hardware lately.
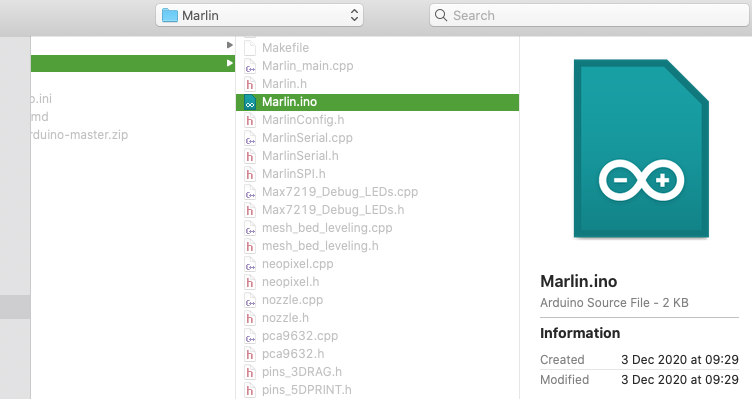
Within Arduino IDE open the Marlin.ino file
Check the Configuration.h file and look for the following entries.
/**
 * The BLTouch probe uses a Hall effect sensor and emulates a servo.
 */
#define BLTOUCH  //3Dtouch---1
#if ENABLED(BLTOUCH)
  #define BLTOUCH_DELAY 675   // (ms) Enable and increase if needed //3Dtouch---2
#endif
If BLTOUCH is defined then this is the firmware you need.
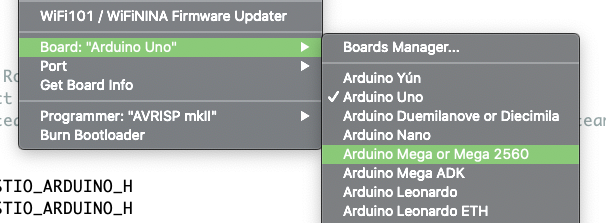
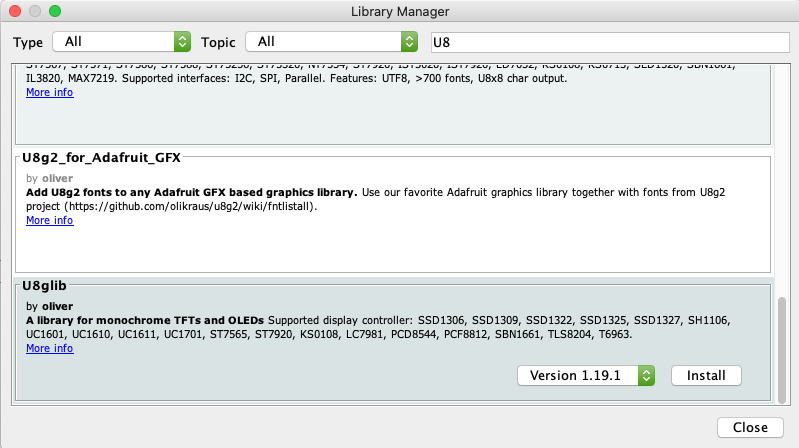
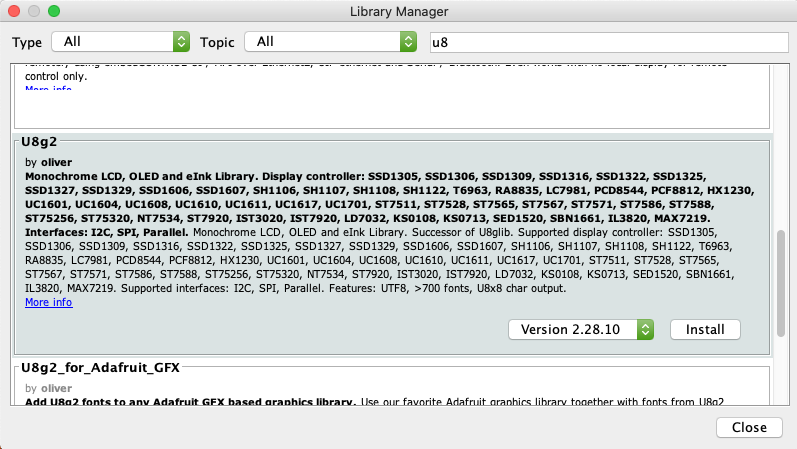
Change the Board Configuration to Mega 2560 and from within the Library Manager ensure the U8glib and U8g2 libraries are installed.
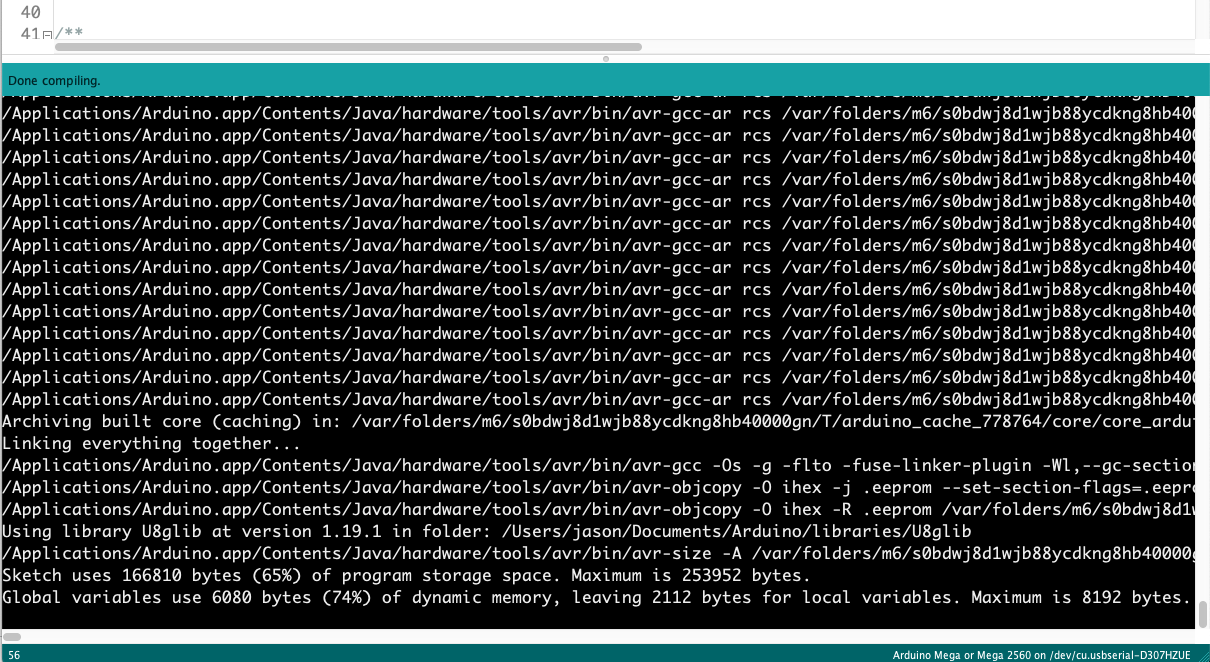
Click the verify button and you should end up with what looks like a successful compilation.
Scroll through the list and you will spot a couple of errors, we’re going to fix them.
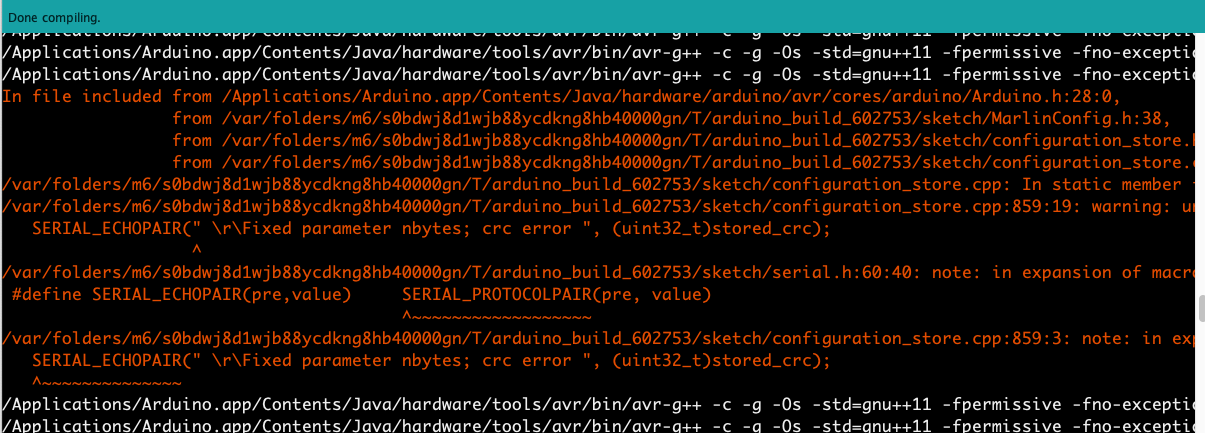
In file included from /Applications/Arduino.app/Contents/Java/hardware/arduino/avr/cores/arduino/Arduino.h:28:0,
                 from /var/folders/m6/s0bdwj8d1wjb88ycdkng8hb40000gn/T/arduino_build_602753/sketch/MarlinConfig.h:38,
                 from /var/folders/m6/s0bdwj8d1wjb88ycdkng8hb40000gn/T/arduino_build_602753/sketch/configuration_store.h:26,
                 from /var/folders/m6/s0bdwj8d1wjb88ycdkng8hb40000gn/T/arduino_build_602753/sketch/configuration_store.cpp:190:
/var/folders/m6/s0bdwj8d1wjb88ycdkng8hb40000gn/T/arduino_build_602753/sketch/configuration_store.cpp: In static member function 'static bool MarlinSettings::Fixed_parameter_load()':
/var/folders/m6/s0bdwj8d1wjb88ycdkng8hb40000gn/T/arduino_build_602753/sketch/configuration_store.cpp:859:19: warning: unknown escape sequence: '\F'
   SERIAL_ECHOPAIR(" \r\Fixed parameter nbytes; crc error ", (uint32_t)stored_crc);
                   ^
/var/folders/m6/s0bdwj8d1wjb88ycdkng8hb40000gn/T/arduino_build_602753/sketch/serial.h:60:40: note: in expansion of macro 'SERIAL_PROTOCOLPAIR'
 #define SERIAL_ECHOPAIR(pre,value)     SERIAL_PROTOCOLPAIR(pre, value)
                                        ^~~~~~~~~~~~~~~~~~~
/var/folders/m6/s0bdwj8d1wjb88ycdkng8hb40000gn/T/arduino_build_602753/sketch/configuration_store.cpp:859:3: note: in expansion of macro 'SERIAL_ECHOPAIR'
   SERIAL_ECHOPAIR(" \r\Fixed parameter nbytes; crc error ", (uint32_t)stored_crc);
   ^~~~~~~~~~~~~~~
To fix this, open the configuration_store.cpp and line 859 change to the following: –
#endif
	}
	else{
		SERIAL_ECHOPAIR(" \r\nFixed parameter bytes; crc error ", (uint32_t)working_crc);
		SERIAL_ECHOPAIR(" \r\nFixed parameter nbytes; crc error ", (uint32_t)stored_crc);
	}
  }
Finally, run verify against the code and you should see a successful build. Congratulations on compiling your own Firmware! Now connect your printer to your device, using the Arduino IDE to connect to the COM port the printer is waiting on and click the upload icon. It may take a minute or two for the firmware to finish uploading, patience is needed. Now you have BLTouch enabled in your printer menus.

If you’ve made it this far, well done! Your effort hasn’t been wasted! You now have a working Firmware build environment for your printer, we’re going to make adaptations to the configuration for other tweaks and workarounds in later articles.
For those of your on Geeetech printers and wanting additional features like Thermal Runaway Protection, then you’ll need to take a look at Vertabreaks Marlin 2 Git repository https://github.com/Vertabreak/Verts-Marlin I’ll cover this off in a future article.
If you’d like to learn more, then I recommend viewing this gentleman’s YouTube channel, he goes through the steps of installing and uploading hex firmware etc, and gives a good description for tuning your printer after the 3D Touch sensor is installed.
Final note…
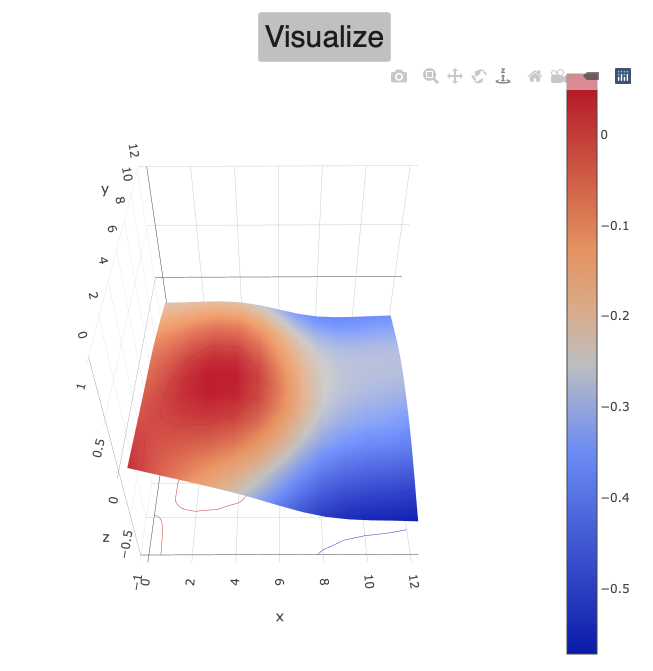
To make use of the 3D Touch Sensor, you will need to add G29 G-Code to your slicer settings after the G28 code like the example below. G28 Auto homes the printhead, and G29 will perform a matrix test of different points of your bed to build an internal mesh. The printer will then work around this when building your designs.

If you’re familiar with Pronterface, you can issue the G29 Code from within the interface which results in bed parameters that you can feed into a Bed Visualiser https://i.chillrain.com/index.php/3d-printer-auto-bed-leveling-mesh-visualizer/
I find this tool invaluable for fine tuning your print bed and I’ll cover this tool off in a future article.


1 Comment »