
OctoPrint – Basic Installation
Today I’m going to cover the basic installation of OctoPrint for the Raspberry Pi. What’s so special about OctoPrint? After all Slicers like Cura, Prusa, Simplify3D etc all have built in print monitoring and direct to hardware print capabilities.
These are of course very valid points, however, if you’re looking for a low cost, low power solution that frees up your main device for more CAD Work, slicing or even Gaming, then this projet is for you. There are cost savings on electricity especially when long prints are concerned that may span over 24 hours.
OctoPrint provides many advantages over printing direct from SD Card, such as the ability to remote monitor temperature, set up a webcam to check print progress and capture time-lapse of the print process, fine tune some of the print parameters and more. Monitoring remotely from your phones browser are added bonuses especially for longer prints.
Best of all, OctoPrint is free!
That said, if you’re only ever going to use your Pi for just OctoPrint, the easiest method of installing and getting up and running is straight from the Raspberry Pi Imager, selecting OctoPi from the Other Specific OS on the drop down.
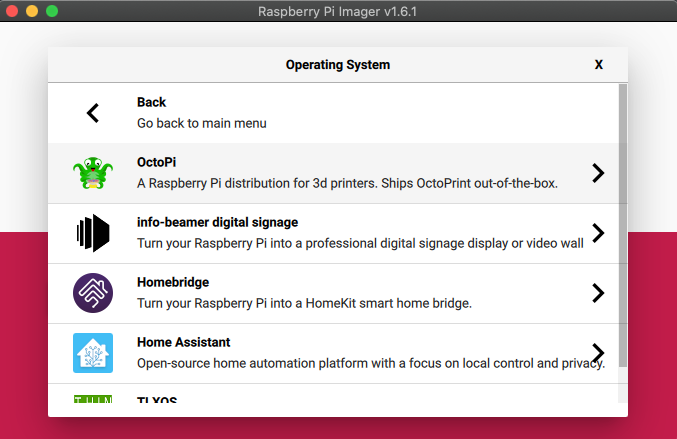
However, if you are using a Raspberry Pi for multiple projects (In my case for Flight Tracking, PiHole, Dev and Testing etc). Then you may want to install your own instance and this article will cover off what is needed.
If you need a starting point for your project, check out this earlier article on headless installation: https://muckypaws.com/2021/01/07/headless-raspberry-pi-desktop-installation/
Use a PuTTY, or SSH Connection to your Raspberry Pi if you don’t have direct access with keyboard and screen to your target Pi, this is covered in the previous article shown above.
Follow the steps below.
Step 1: Check the OS is up to date
sudo apt update -y && sudo apt upgrade -y
Step 2: Install Virtual Environments (If you haven’t already)
sudo pip install virtualenv
Step 3: Create a Python3 Virtual Environment
cd ~
python3 -m venv OctoPrint
Step 4: Install the Latest OctoPrint
~/OctoPrint/bin/pip install OctoPrint
Depending on your Pi configuration, you may need to add the user id being used for the install to the tty and dialout groups. This is required to enable access to the printers serial port.
pi@raspberrypi:~ $ groups
pi adm cdrom sudo audio video plugdev games users input netdev lpadmin gpio i2c spi
pi@raspberrypi:~ $ sudo usermod -a -G tty pi
pi@raspberrypi:~ $ sudo usermod -a -G dialout pi
Step 5: Start the OctoPrint Service
~/OctoPrint/bin/octoprint serve > ~/OctoLogTemp.txt
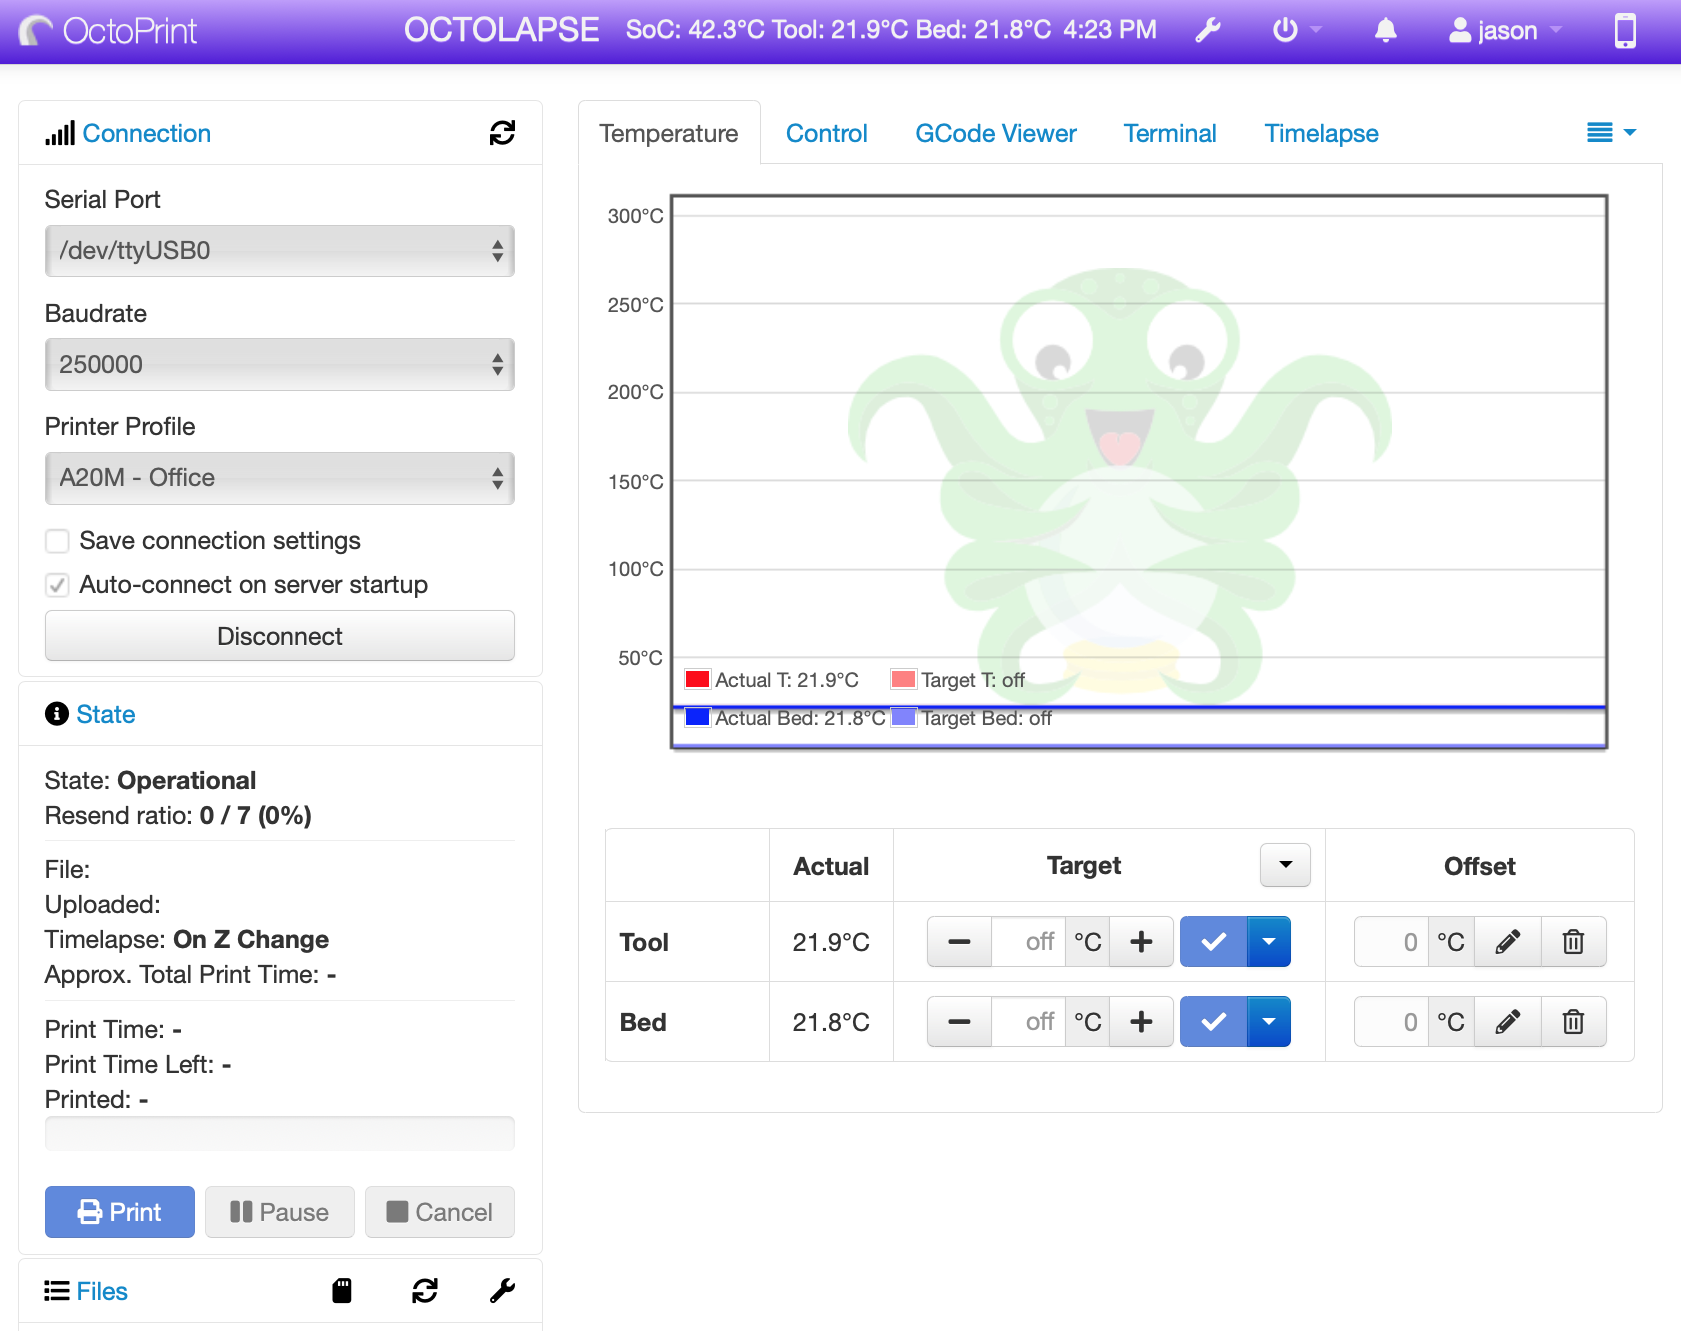
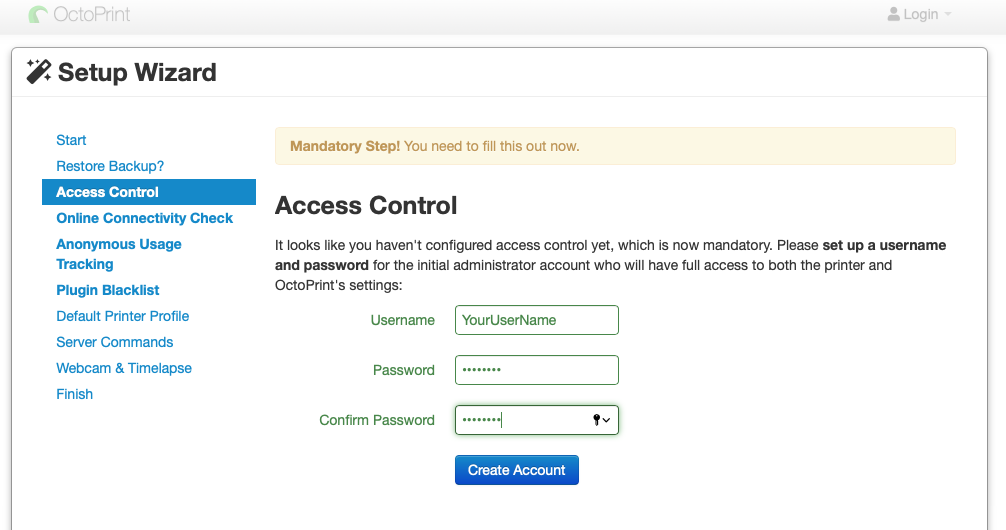
Step 6: Configure OctoPrint via the UI
At this point you could start up the OctoPrint UI from a web browser on your network, by using either the IP address of your Raspberry PI or the hostname of the pi. For example, if you’re using the basic Raspbian install and not changed the hostname the url would be:
The default port (for now, is 5000) we can change this later.
If all has gone to plan you will be greeted with the following :-
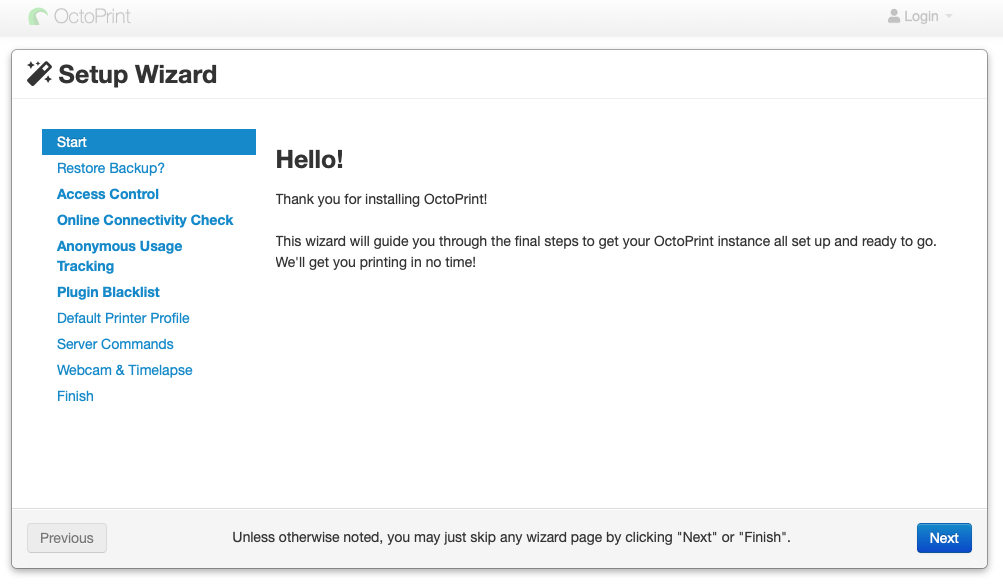
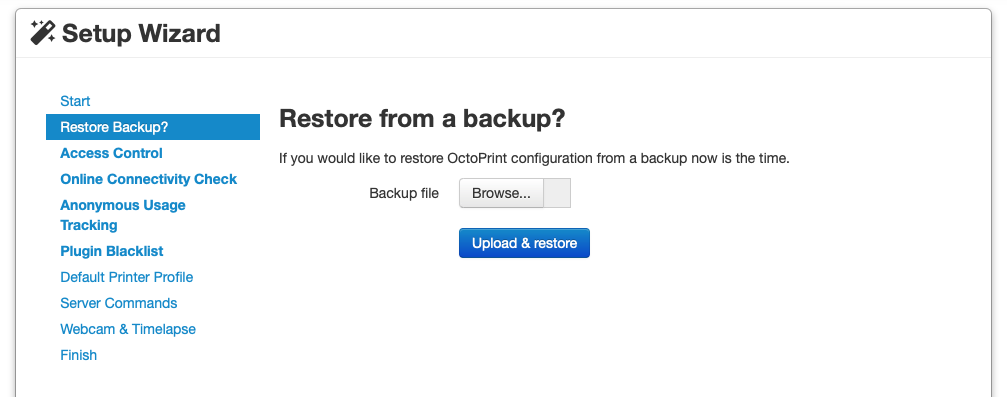
Follow the instructions as you work through configuration. We’re not restoring from back up since we’re going for a clean installation, click Next.
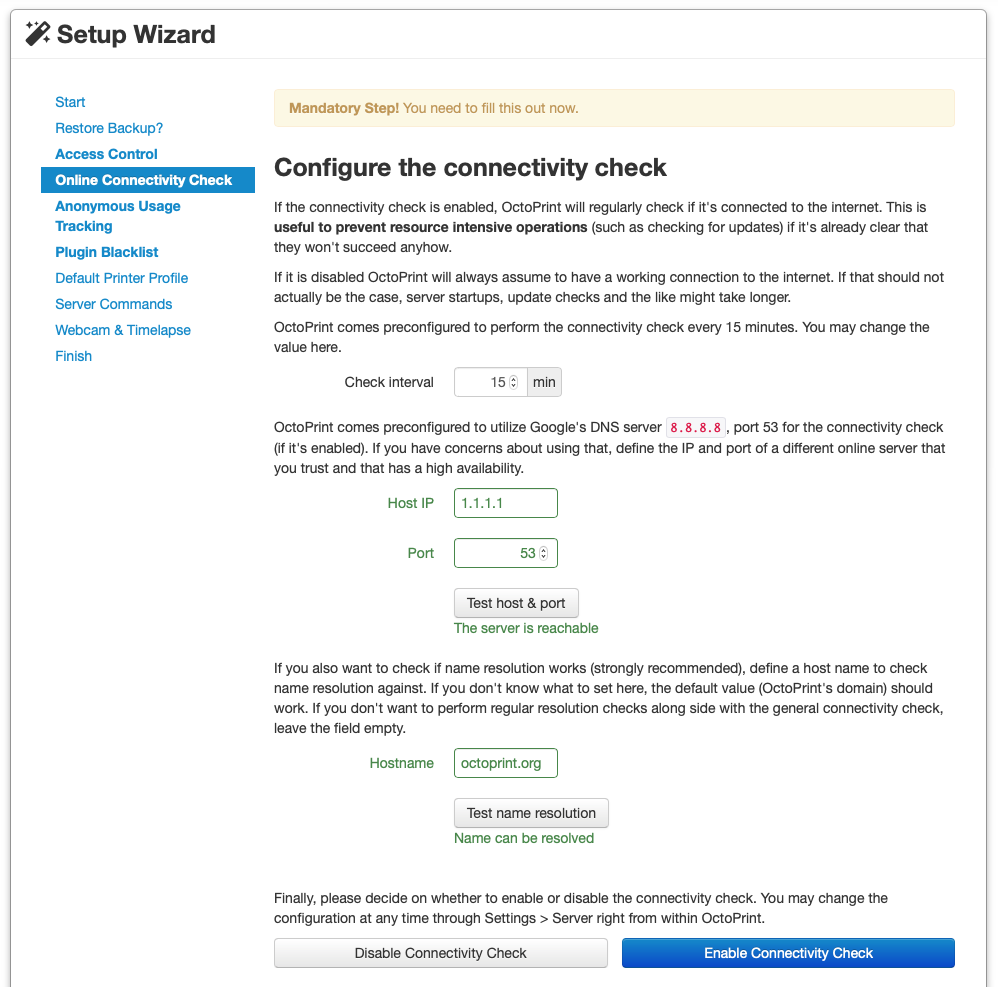
Next, check connectivity to the internet. Note I am using DNS 1.1.1.1 and 1.0.0.1 which are cloudflares secure DNS Servers, after all we don’t want google knowing everything, plus it’s a faster resolver, more on that in another post. Click the test buttons and if all is well, you’ll see the green confirmations as shown below. Finally click connectivity Check to confirm or disable this check each time the service is started.
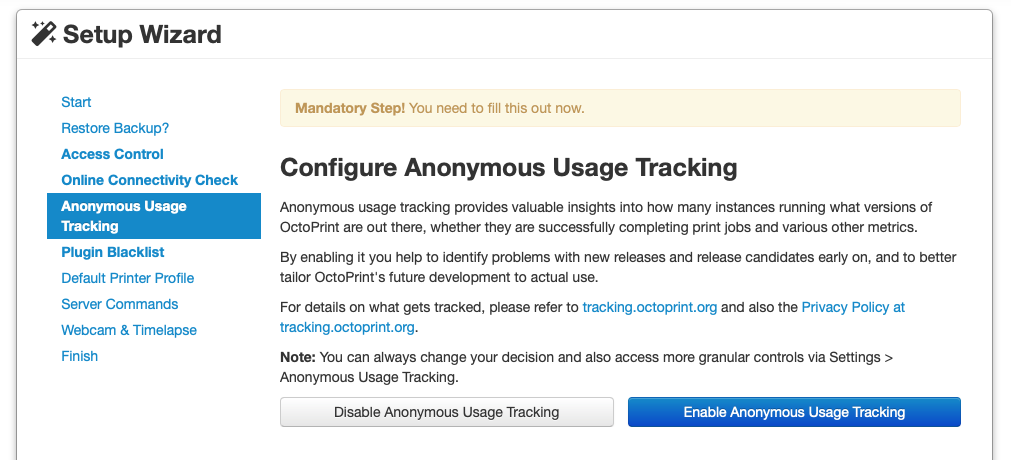
Decide if you want OctoPrint to collect anonymous usage stats and tracking of the app.
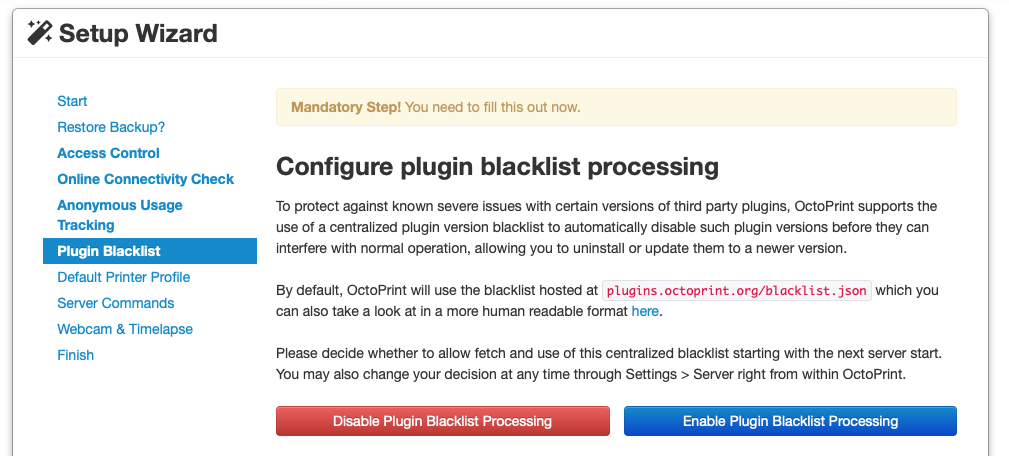
I have chosen to Enable Black List Plugin Processing, after all I want my instance to be as stable as possible on my production network.
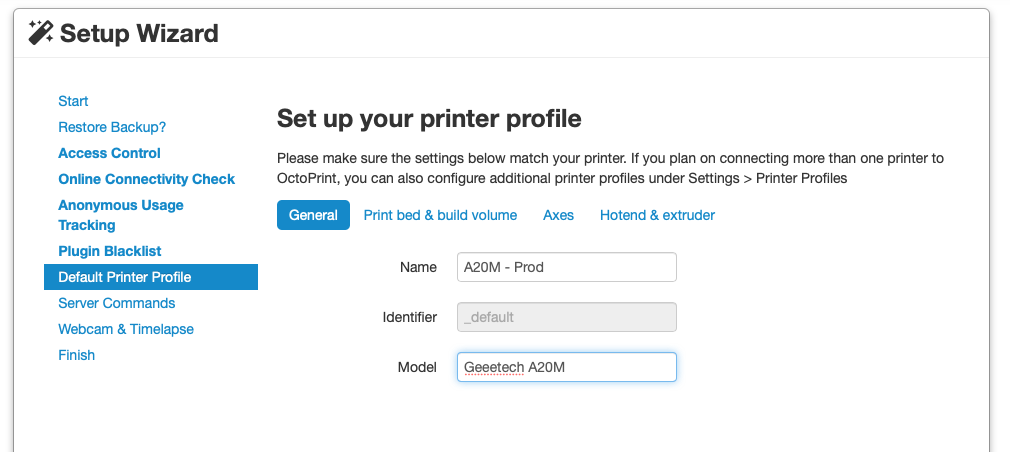
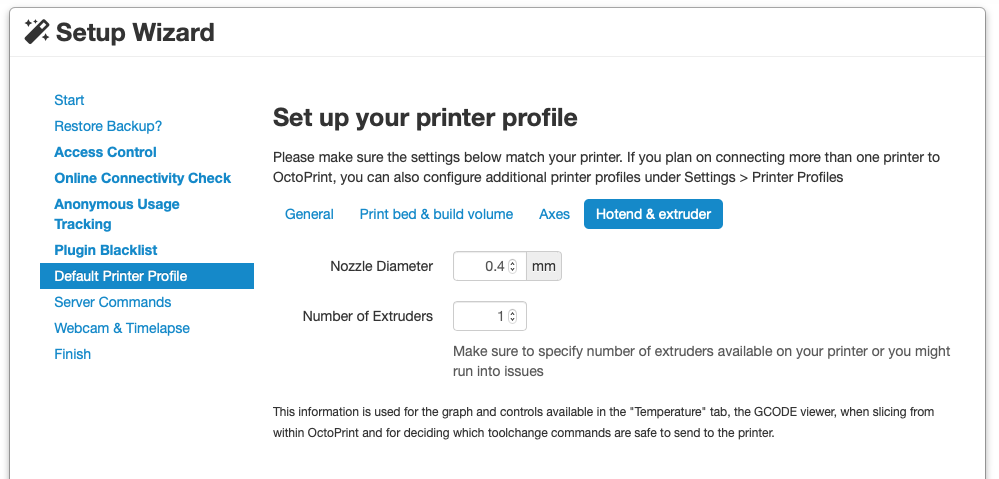
Now set up your printer name and type, following each of the sections on default printer. I’m using a Geeetech A20M for which you can find further articles on this brilliant hobbyist printer here: https://muckypaws.com/category/3d-printing/
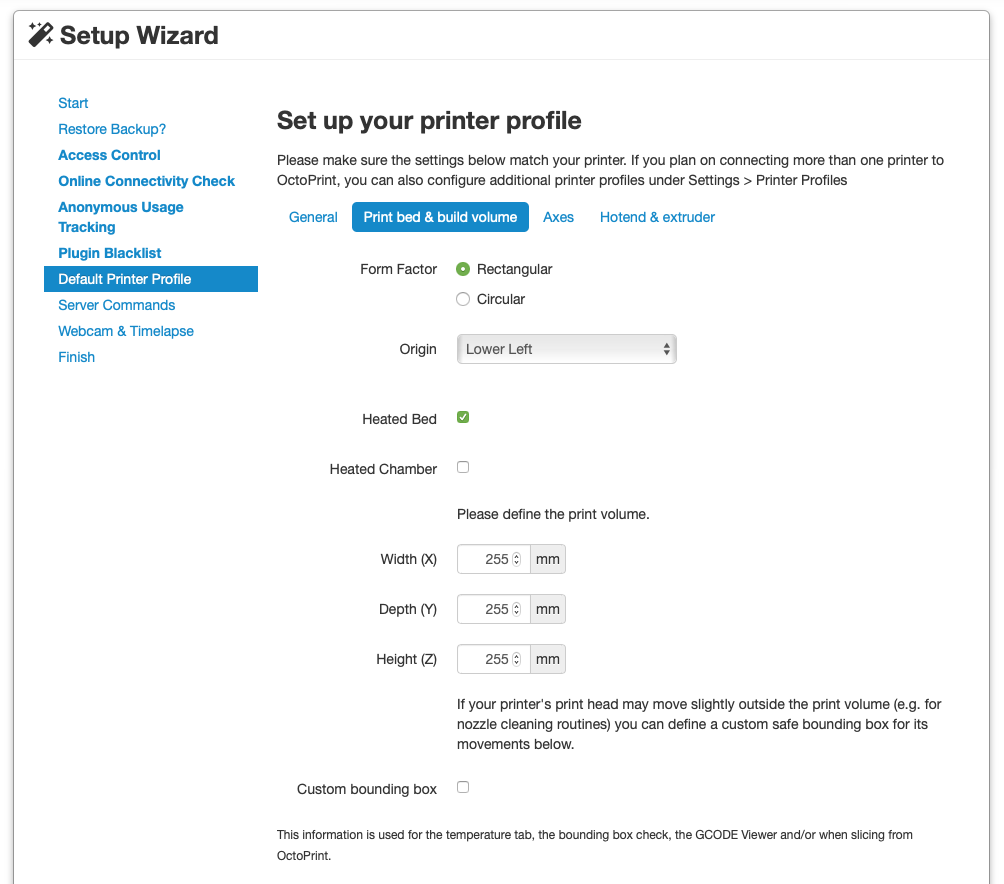
You will need to define the type of bed and build volume as per your printer manufacturers details. I’m using a default 0.4mm print head.
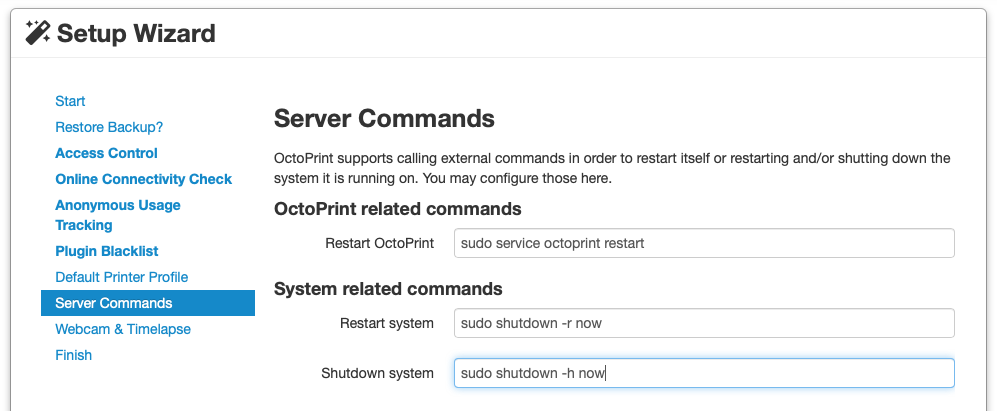
The following information you will need to add to the server commands,
sudo service octoprint restart

sudo shutdown -r now

sudo shutdown -h now
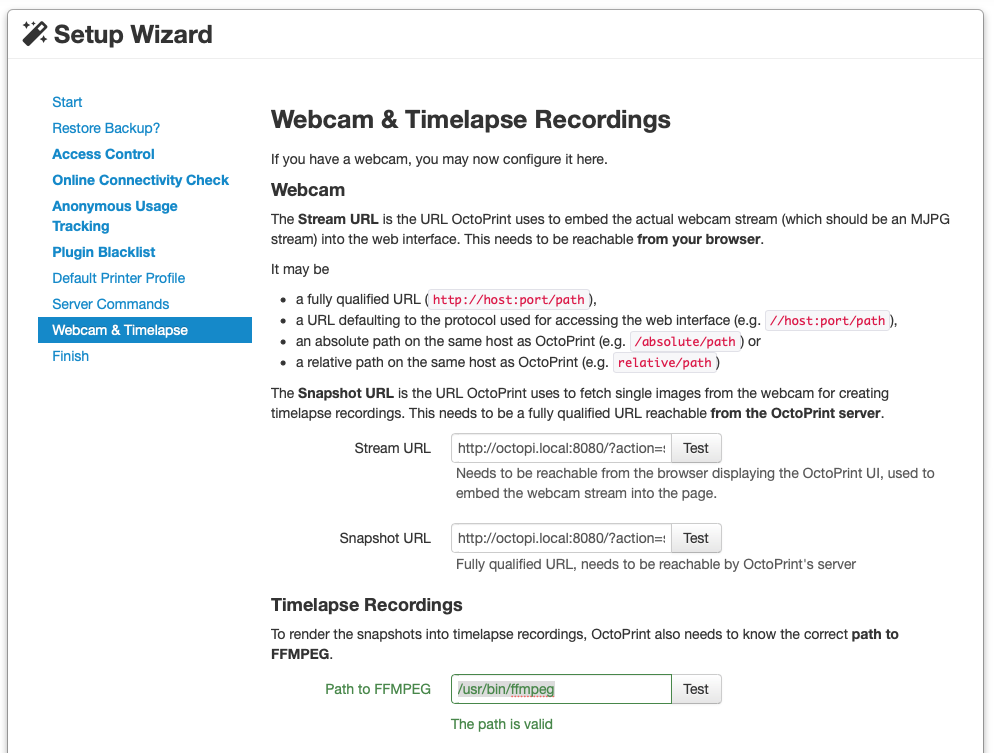
Follow this step if you plan on adding a webcam to your printer for creating time-lapse images, or just visual monitoring of a print job.
  STREAM URL: http://octopi.local:8080/?action=stream

SNAPSHOT URL: http://octopi.local:8080/?action=snapshot

      FFMPEG: /usr/bin/ffmpeg
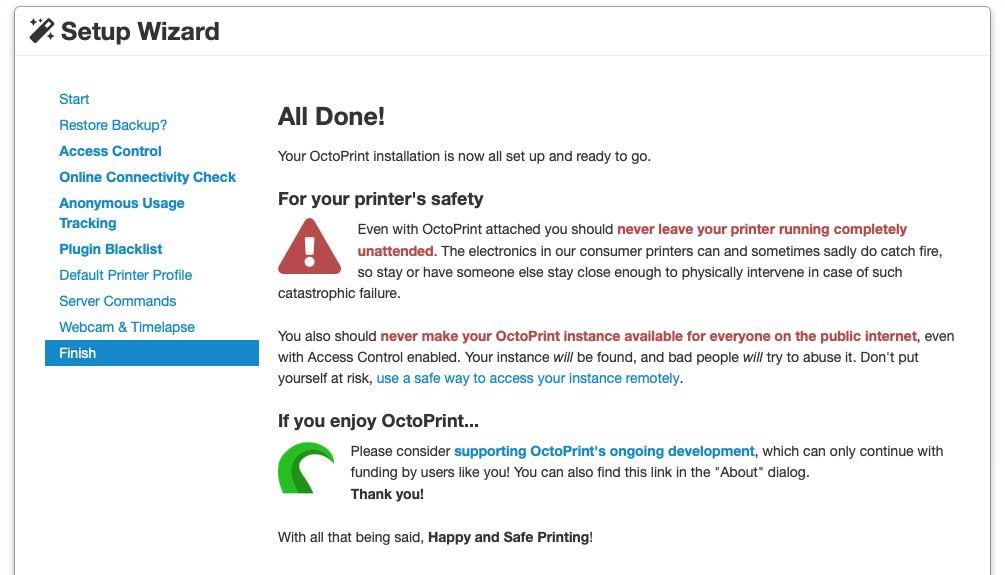
Basic Configuration Complete!
Step 7: Autostart OctoPrint Service on Reboot
We’re keen and want to get on with printing right? You could do that, but first I recommend performing the following steps to ensure OctoPrint service restarts on boot up/restart of your PI.
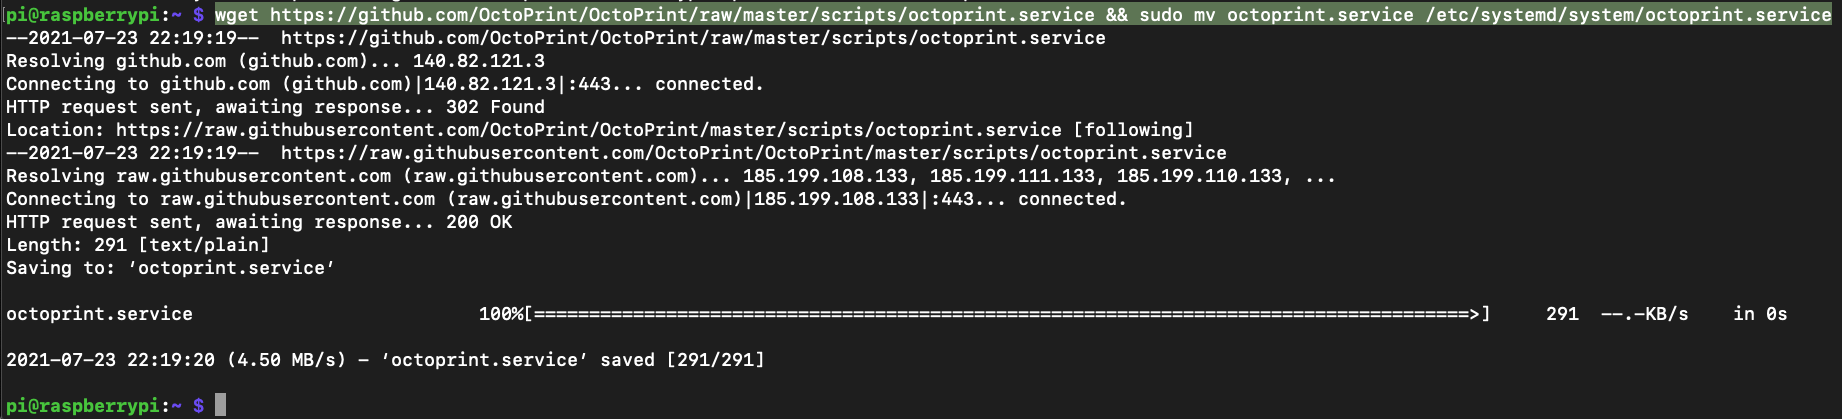
Type the following command, all on one line (It looks like the page has reformatted the text).
wget https://github.com/OctoPrint/OctoPrint/raw/master/scripts/octoprint.service && sudo mv octoprint.service /etc/systemd/system/octoprint.service
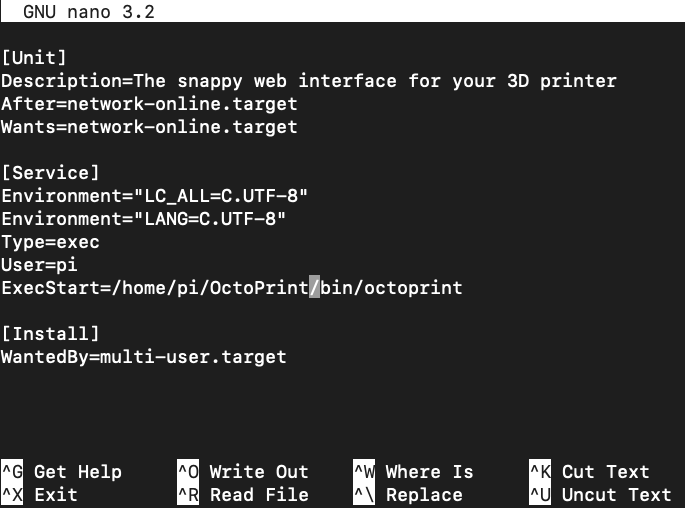
You will need to edit the /etc/systemd/system/octoprint.service file to point to the correct instance of your OctoPrint Service. In the instance, ExecStart needs the venv part of the path removing. Use vi or nano to edit the file, nano is much easier for less experienced linux users.
pi@raspberrypi:~ $ cat /etc/systemd/system/octoprint.service
[Unit]
Description=The snappy web interface for your 3D printer
After=network-online.target
Wants=network-online.target

[Service]
Environment="LC_ALL=C.UTF-8"
Environment="LANG=C.UTF-8"
Type=exec
User=pi
ExecStart=/home/pi/OctoPrint/venv/bin/octoprint

[Install]
WantedBy=multi-user.target
pi@raspberrypi:~ $
pi@raspberrypi:~ $ cat /etc/systemd/system/octoprint.service
[Unit]
Description=The snappy web interface for your 3D printer
After=network-online.target
Wants=network-online.target

[Service]
Environment="LC_ALL=C.UTF-8"
Environment="LANG=C.UTF-8"
Type=exec
User=pi
ExecStart=/home/pi/OctoPrint/bin/octoprint

[Install]
WantedBy=multi-user.target
pi@raspberrypi:~ $
Now enable the service
sudo systemctl enable octoprint.service

sudo service octoprint start
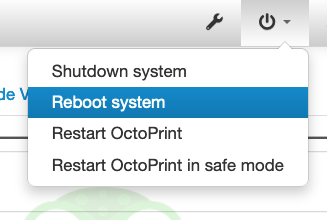
At this point, you can restart your Raspberry Pi either from the command line or the UI and the OctoPrint service will automatically restart on startup.
Step 8: Install Add-Ins (Optional)
There are some very worthwhile plug-ins to use with OctoPrint, I won’t go through them in this article, except two really useful plugins that will help with bed levelling and reducing your G-Code file size which may also improve print quality on 8bit boards.
Visual Bed Levelling
Only follow this step if you have a Z-Probe/Automatic Level installed on your printer.
Before installing the Visual Bed Levelling Plug-In you may need to install another library onto your Pi using the following :-
sudo apt install libatlas3-base
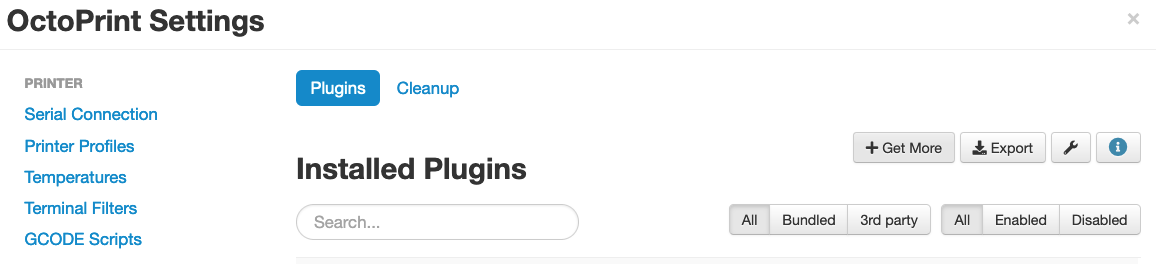
From the UI, go to OctoPrint Settings by clicking on the Spanner Icon on the Top Header Bar and select Plugin Manager.
Click the Get More button and in the search bar, type VISUAL
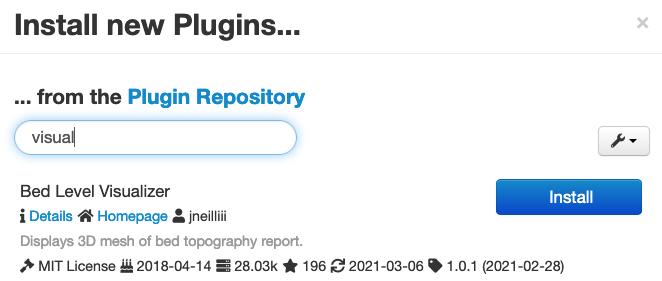
Here you’ll find Bed Level Visualizer, click install.
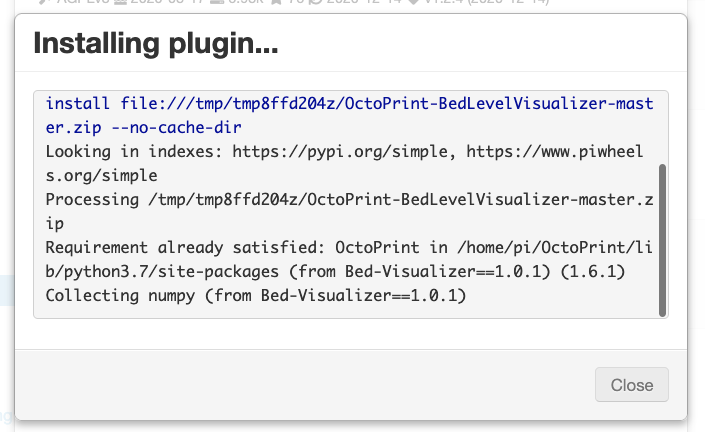
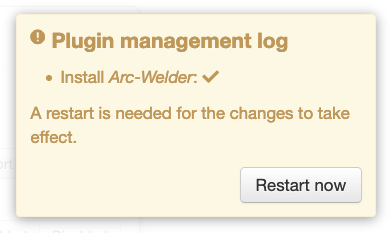
You will be prompted to restart the service, follow the onscreen instructions, which if you have, you will see a new drop down menu on the UI.
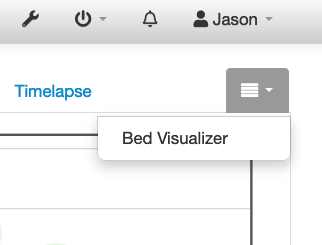
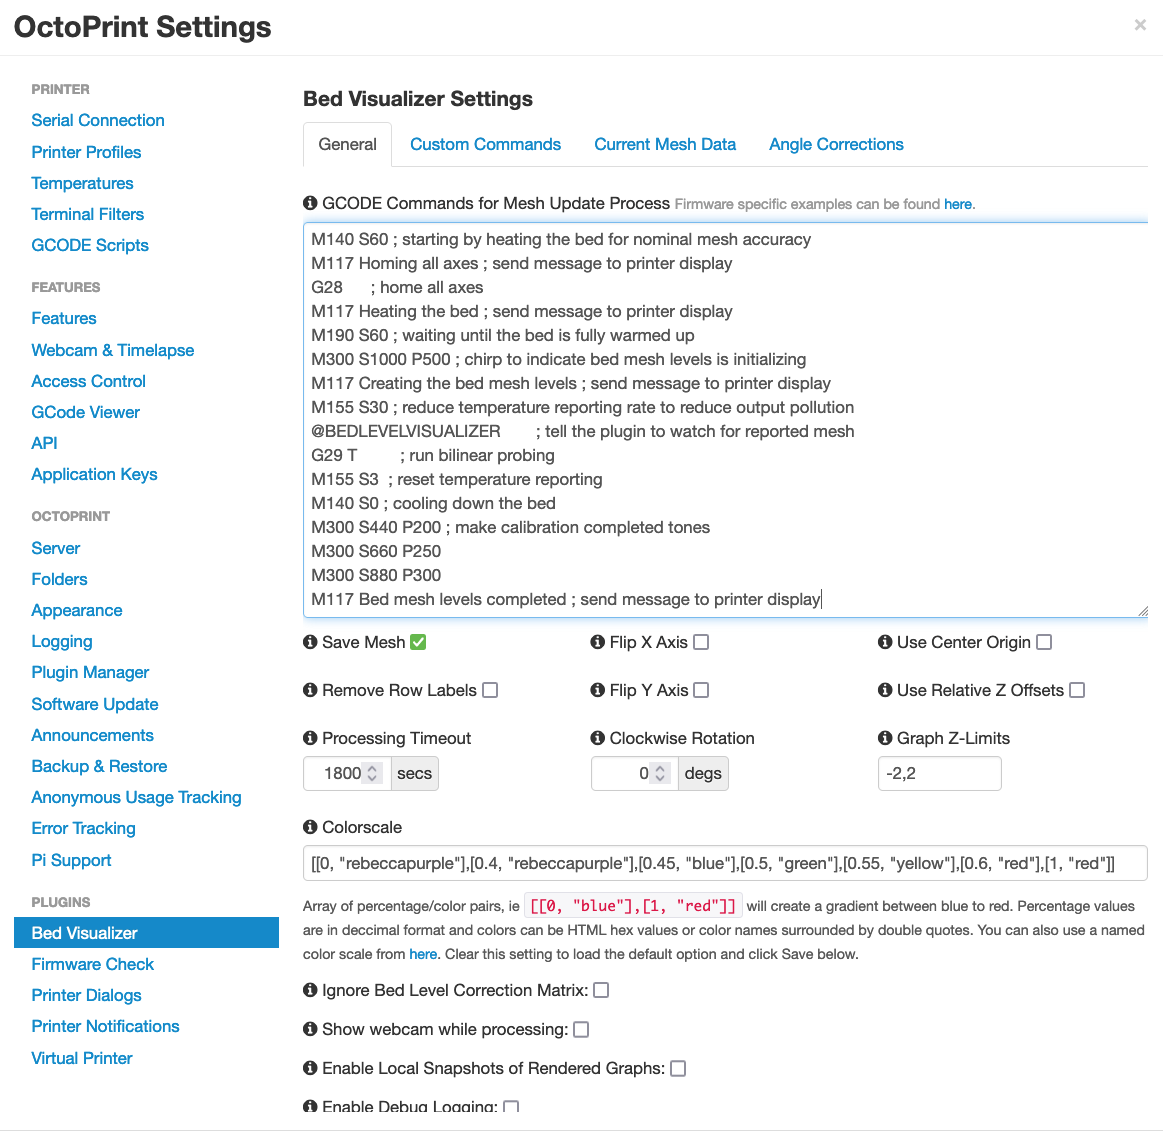
Click the blocks with the down arrow and select Bed Visualizer. You will be prompted to enter some settings.
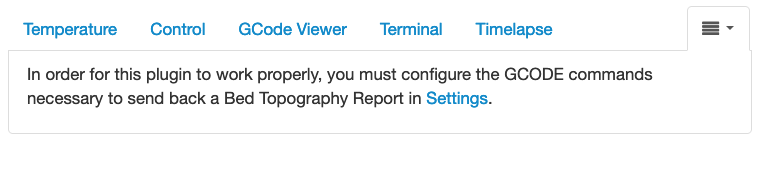
Here, I’ve used settings specific to Marlin G-Code Firmware, by pre-heating the bed to 60 Degrees, G28 Homes all Axis to the centre, G29 starts the probing of the print bed. If you don’t have a Z-Probe installed, then this plugin won’t work for you.
M140 S60 ; starting by heating the bed for nominal mesh accuracy
M117 Homing all axes ; send message to printer display
G28      ; home all axes
M117 Heating the bed ; send message to printer display
M190 S60 ; waiting until the bed is fully warmed up
M117 Creating the bed mesh levels ; send message to printer display
M155 S30 ; reduce temperature reporting rate to reduce output pollution
@BEDLEVELVISUALIZER	; tell the plugin to watch for reported mesh
G29 T	   ; run bilinear probing
M155 S3  ; reset temperature reporting
M140 S0 ; cooling down the bed
M300 S440 P200 ; make calibration completed tones
M300 S660 P250
M300 S880 P300
M117 Bed mesh levels completed ; send message to printer display
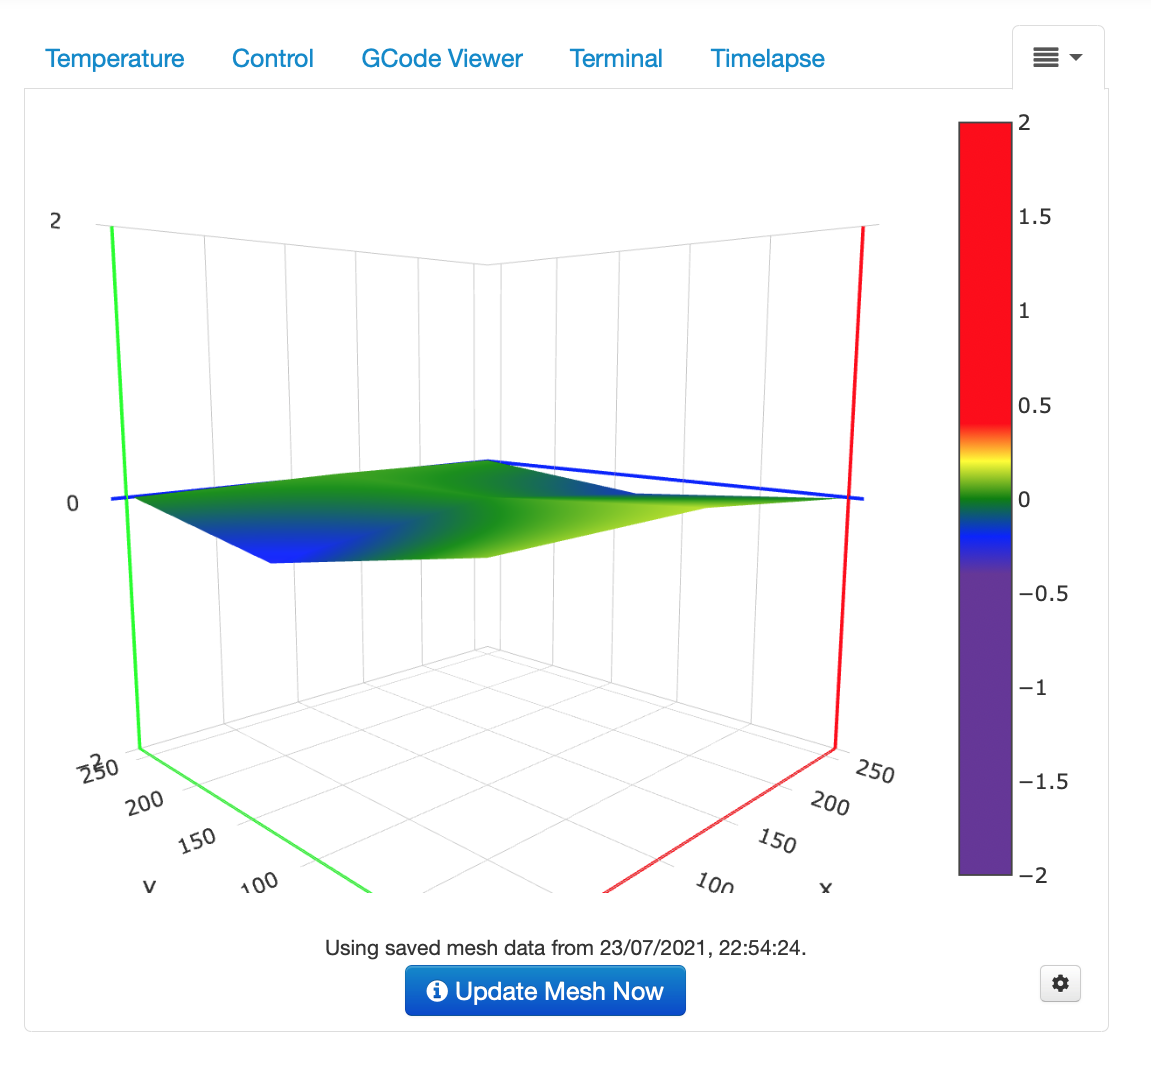
Once configured, you can now hit the Update Mesh button of the Visualiser and wait for the printer to complete it’s probing of the bed. The results are shown below. If you’re print bed is wildly out of level, you will need to adjust the levelling screws on each corner, and in some cases, use aluminium foil to make shims to add between the bed surface and the plate, since heat beds are very rarely perfectly flat. The shims will help retain heat loss through air gaps, and level the bed. Also check your printer for any obstructions on your bearings, axis and belts.
ARC Welder
ARC Welder is a very popular plug in to help reduce the size of G-Code files. Original G-Code didn’t take into consideration arcs and so everything was defined as triangular points, hence why some circular prints may look like they’re made up of multiple flat parts.
Newer printer firmwares respect the G90/G91 G-Codes that define an Arc. Arc welder detects when an arc is being formed and removes the multiple move commands and replaces it with an Arc, the result is usually better prints, though there are some trade offs/exceptions.
Thankfully installation is simple. Search for Arc Welder in the Plugins configuration, click install

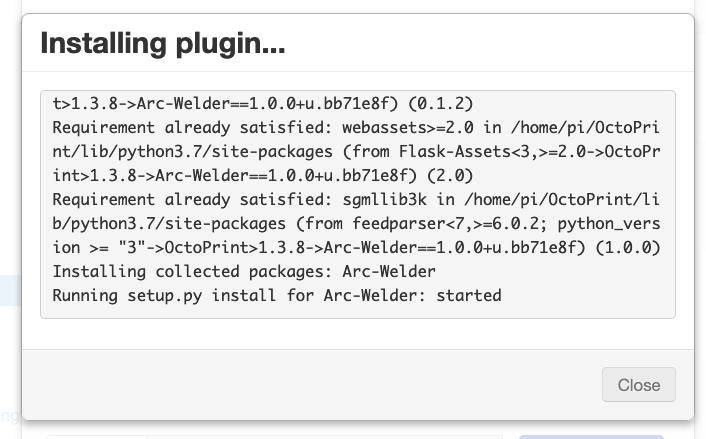
There’s many configuration options for Arc Welder too many for this article, the defaults will serve you quite well for now.
Step 9: Install and Configure WebCam (Optional)
if you plan on adding a WebCam, these are the additional configuration steps.
Step 9a: Install and Compile mjpg-streamer
Compile? What? Yes you’ll need to compile the project, thankfully the steps are easy.
cd ~
sudo apt install cmake make libjpeg8-dev gcc g++ git
git clone https://github.com/jacksonliam/mjpg-streamer.git
cd ~/mjpg-streamer/mjpg-streamer-experimental
make
It will take a while to compile the code, and if all has gone well, you can test the service by the following :-
cd ~/mjpg-streamer/mjpg-streamer-experimental
./mjpg_streamer -i "./input_uvc.so" -o "./output_http.so"
This will start up the WebCam Service using the basic 640 x 480 configuration. Provided the webcam daemon starts successfully, you will be able to access the camera from any device on your network by using the following URL
http://<your Raspi’s IP>:8080/?action=stream
Where <your Raspi’s IP> is the IP address of the Pi or the Network Name, i.e. OctoPi.local, raspberry.local
if you plan on adding a WebCam, there are some additional configuration

At a basic level this will work, but I’m sure you want greater control over the WebCam when it stops/starts? Thankfully OctoPrint is highly configurable with YAML and Shell scripts to extend functionality.
Step 9b: Create Web Cam Startup/Shutdown Scripts
Using your favourite editor (vi, nano) or even a client based editor over SSH create the following files below, or find the latest version here: https://github.com/muckypaws/Raspberry-Pi/tree/main/OctoPrint/Webcam
cd ~
mkdir scripts
cd scripts
nano webcam
#!/bin/bash
# Start / stop streamer daemon

case "$1" in
    start)
        /home/pi/scripts/webcamDaemon >/dev/null 2>&1 &
        echo "$0: started"
        ;;
    stop)
        pkill -x webcamDaemon
        pkill -x mjpg_streamer
        echo "$0: stopped"
        ;;
    *)
        echo "Usage: $0 {start|stop}" >&2
        ;;
esac
nano webcamDaemon
#!/bin/bash

MJPGSTREAMER_HOME=/home/pi/mjpg-streamer/mjpg-streamer-experimental
MJPGSTREAMER_INPUT_USB="input_uvc.so"
MJPGSTREAMER_INPUT_RASPICAM="input_raspicam.so"

# init configuration
camera="auto"
camera_usb_options="-r 640x480 -f 10"
camera_raspi_options="-fps 10"

if [ -e "/boot/octopi.txt" ]; then
    source "/boot/octopi.txt"
fi

# runs MJPG Streamer, using the provided input plugin + configuration
function runMjpgStreamer {
    input=$1
    pushd $MJPGSTREAMER_HOME
    echo Running ./mjpg_streamer -o "output_http.so -w ./www" -i "$input"
    LD_LIBRARY_PATH=. ./mjpg_streamer -o "output_http.so -w ./www" -i "$input"
    popd
}

# starts up the RasPiCam
function startRaspi {
    logger "Starting Raspberry Pi camera"
    runMjpgStreamer "$MJPGSTREAMER_INPUT_RASPICAM $camera_raspi_options"
}

# starts up the USB webcam
function startUsb {
    logger "Starting USB webcam"
    runMjpgStreamer "$MJPGSTREAMER_INPUT_USB $camera_usb_options"
}

# we need this to prevent the later calls to vcgencmd from blocking
# I have no idea why, but that's how it is...
vcgencmd version

# echo configuration
echo camera: $camera
echo usb options: $camera_usb_options
echo raspi options: $camera_raspi_options

# keep mjpg streamer running if some camera is attached
while true; do
    if [ -e "/dev/video0" ] && { [ "$camera" = "auto" ] || [ "$camera" = "usb" ] ; }; then
        startUsb
    elif [ "`vcgencmd get_camera`" = "supported=1 detected=1" ] && { [ "$camera" = "auto" ] || [ "$camera" = "raspi" ] ; }; then
        startRaspi
    fi

    sleep 120
done
cd ~/scripts
chmod +x webcam
chmod +x webcamDaemon
Step 9c: Stop and Start the WebCam via the Octoprint Interface
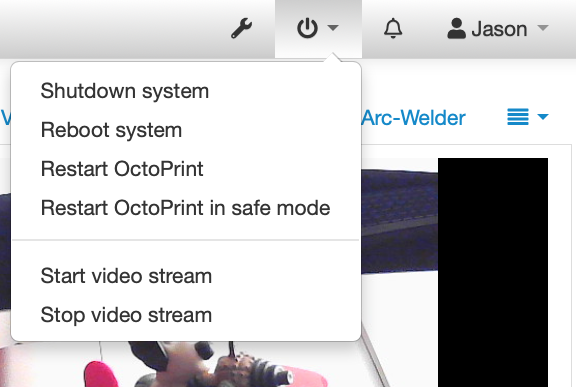
It would be more user friendly to be able to stop/start the WebCam via Octoprints Menu system. And there’s an easy way to achieve this, via config.yaml
Again, using your favourite text editor.
cd ~/.octoprint
nano config.yaml
system:
  actions:
   - action: streamon
     command: /home/pi/scripts/webcam start
     confirm: false
     name: Start video stream
   - action: streamoff
     command: sudo /home/pi/scripts/webcam stop
     confirm: false
     name: Stop video stream
Add the above lines of text to the end of the config file, check and then save.
Restart OctoPrint via the UI, the new menu items have now been appended.
Step 9d: Start WebCam on Pi Startup (Optional)
If you need the webcam daemon to start on boot or full restart add the following to your /etc/rc.local file.
/home/pi/scripts/webcam start
#!/bin/sh -e
#
# rc.local
#
# This script is executed at the end of each multiuser runlevel.
# Make sure that the script will "exit 0" on success or any other
# value on error.
#
# In order to enable or disable this script just change the execution
# bits.
#
# By default this script does nothing.

# Print the IP address
_IP=$(hostname -I) || true
if [ "$_IP" ]; then
  printf "My IP address is %s\n" "$_IP"
fi

# Start the WebCam Daemon On StartUp
/home/pi/scripts/webcam start
exit 0
Step 10: Change the Default Port
This method is crude and dirty, and simply involves changing the PORT number for your OctoPrint instance. However, you can not change this to PORT 80 due basic linux security and the need to run as ROOT on this port. I’ll cover off the use and configuration of HAProxy for port forwarding in a later article.
nano /etc/systemd/system/octoprint.service
[Unit]
Description=The snappy web interface for your 3D printer
After=network-online.target
Wants=network-online.target

[Service]
Environment="LC_ALL=C.UTF-8"
Environment="LANG=C.UTF-8"
Type=exec
User=pi
ExecStart=/home/pi/OctoPrint/bin/octoprint --port=5010

[Install]
WantedBy=multi-user.target
Look for the line starting with ExecStart and add –port=5010 replacing 5010 with the port number you want configured.
sudo systemctl daemon-reload
sudo service octoprint-restart
Now don’t forget to use the new port number in your URL to reconnect to the OctoPrint Service.
Finally
I hope you found this useful and helped you on your way to better control of your 3D printing. If there’s any errors/omissions or tips you wish to share, please feel free to leave a comment below.
If you enjoyed this, please consider subscribing to my Blog or sharing on social media.
Jason x


Thank you for this guide. I already had a RPI 4 running Raspbian and PiHole then the wife got me a Voxelab Aquila(which happens to be an exact clone of the Ender 3 v2, but better according to their subreddit) I didn’t want to restart everything from scratch on my RPI. Your guide had me up and running in about 20 mins with OctoPrint and after playing a bit I went back and added a webcam using the additional information. I did have to change /pi/ in the scripts to my username but that was easy enough.
Thanks again!
LikeLike