
3D Printing – Retraction Calibration
Are you finding a problem with prints stringing? You’re not alone and there’s a number of reasons this can be happening, for example nozzle temperature or even the material you’re using.
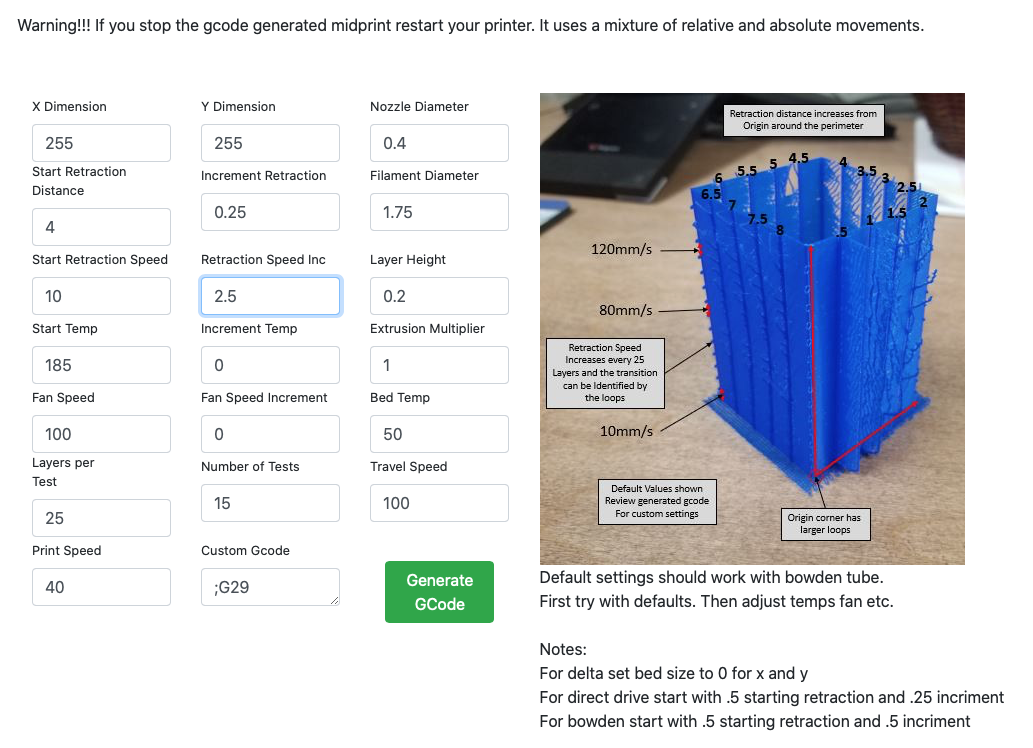
I found a handy tool on on-line – http://retractioncalibration.com – which generates appropriate G-Code based on input parameters to produce a calibration tower to help you dial in those printer settings. The author has an active Facebook support group which can be found here: https://www.facebook.com/groups/199257421413533/
Focus on a specific test to start with. I used the following parameters to test for the best retraction speed and distance for the filament I’m planning on using. I know the optimal temperature to be 185 Degrees and I have left that as is for now. If you have a direct drive printer and not one with a Bowden Tube, retraction distance starts from 0.1mm and 0.05mm increments
The online tool will generate the appropriate G-Code for you to download and copy to SD Card. The first calibration tower I printed resulted in a mess like this :-
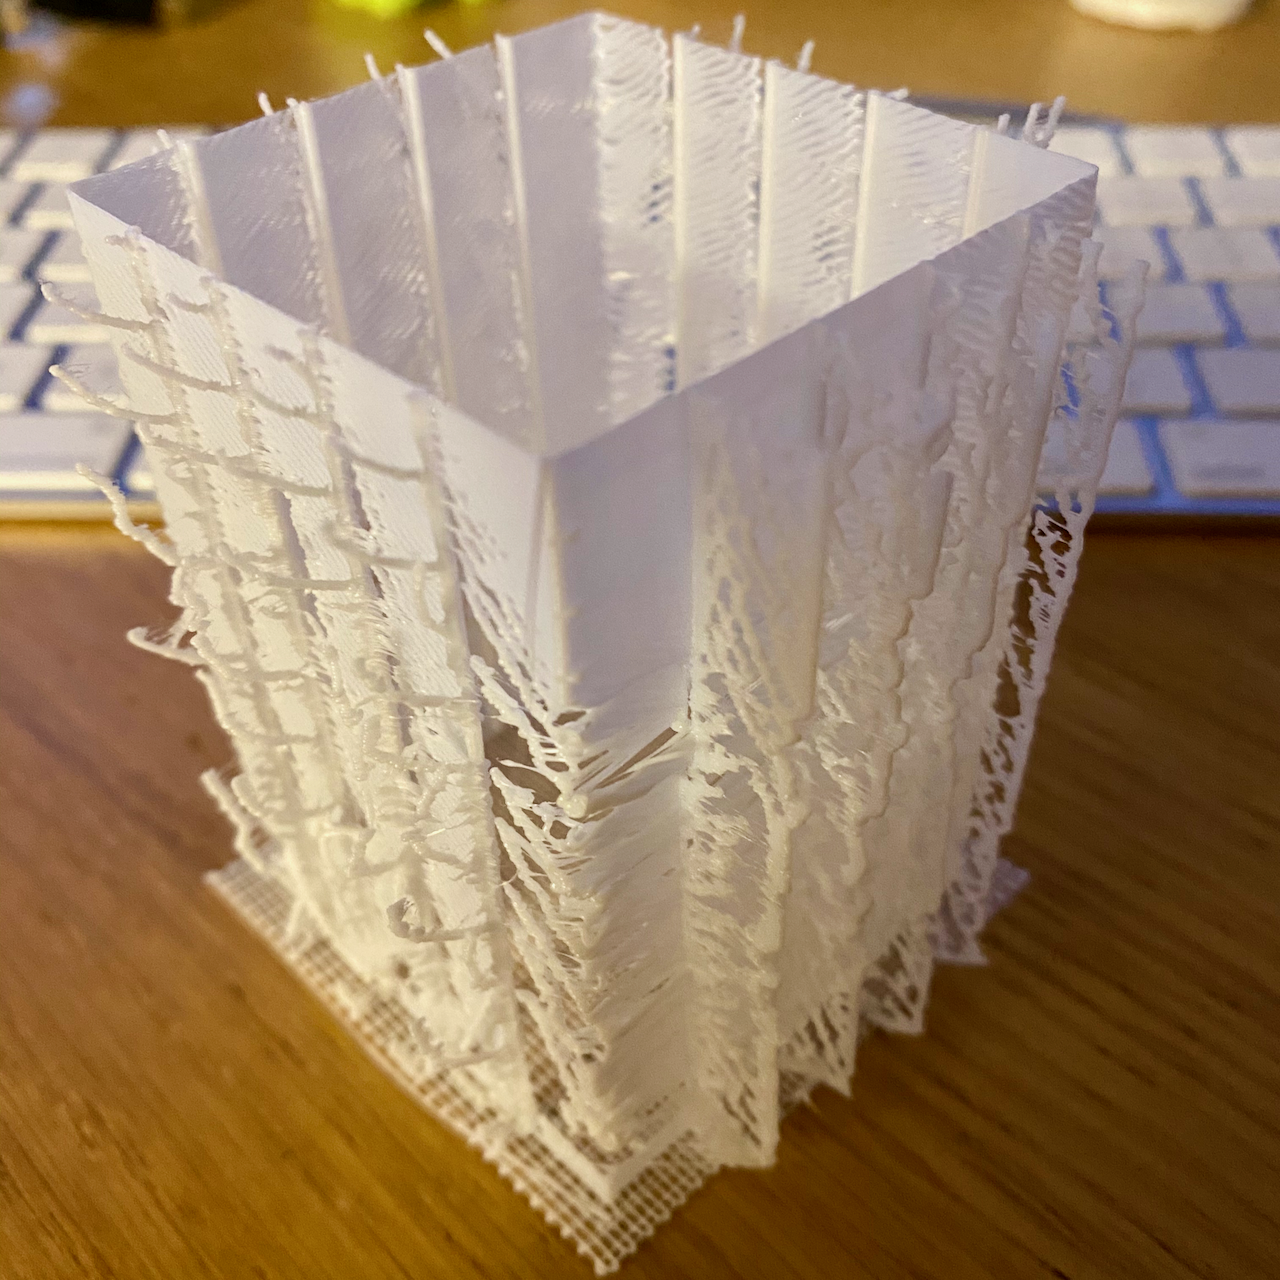
Don’t panic, since this is a good start for an uncalibrated printer. Taking a look at the G-Code you get a sense of what the settings are for each section of the calibration tower.
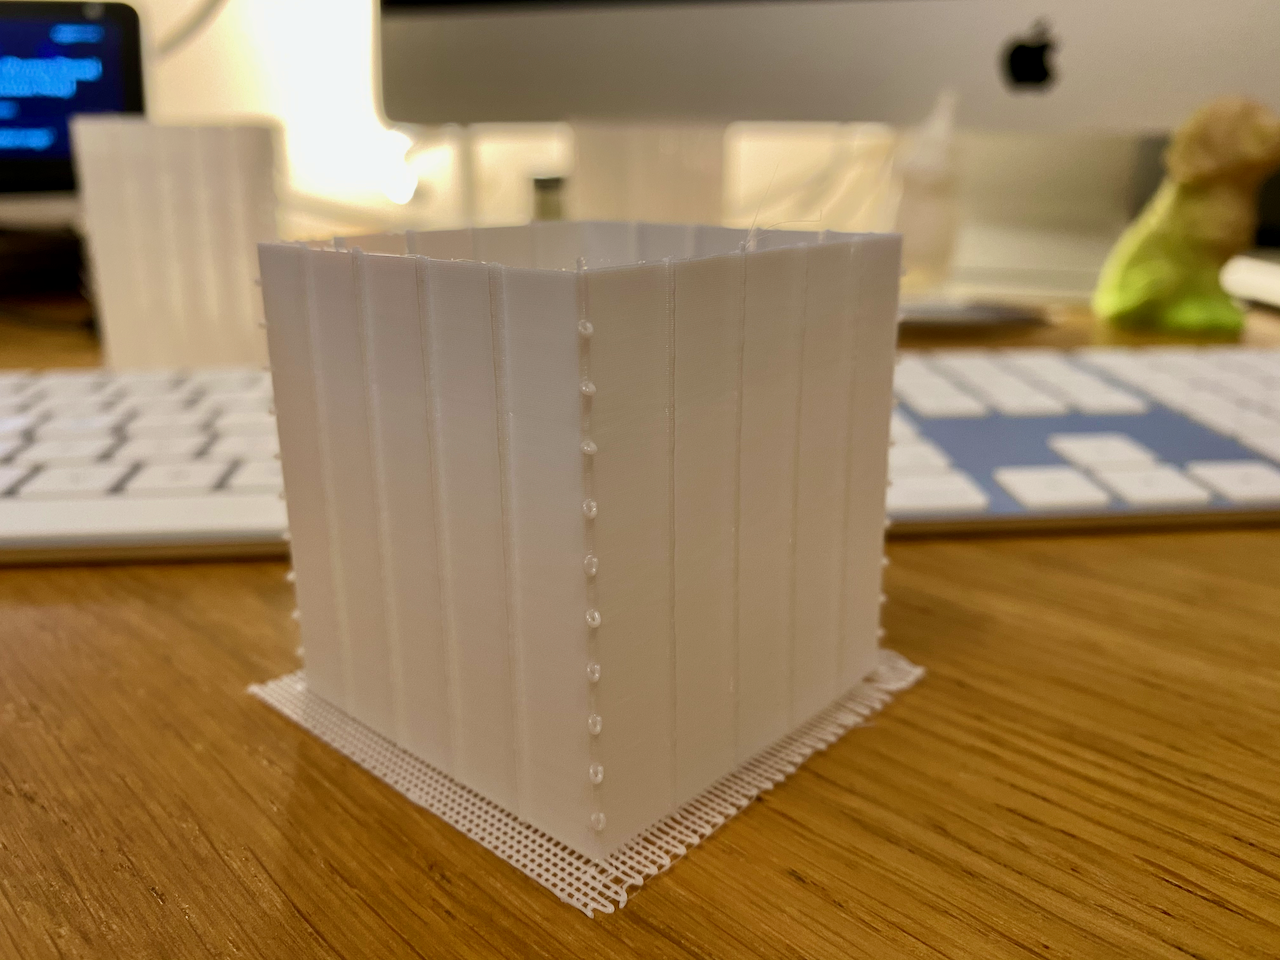
Examine your tower and look to find the smoothest print (less stringing) and match that to the information in your generated G-Code. In my case I found for the Geeetech A20M a 6mm Retraction distance with a speed of 40mm/s worked well producing the finest print without stringing.
 ;Calibration Generator 1.3.4
 ;
 ;
 ;Retraction Distance from the top looking down
 ;
 ;       6.75    6.50    6.25    6.00
 ;        |       |       |       |
 ;
 ;7.00-                               -5.75
 ;
 ;
 ;7.25-                               -5.50
 ;
 ;
 ;7.50-                               -5.25
 ;
 ;
 ;7.75-                               -5.00
 ;
 ;        |       |       |       |
 ;       4.00    4.25    4.50    4.75
 ;
 ;
 ;Variables by Height
 ;
 ;Height         Retraction  Nozzle      Fan
 ;               Speed       Temp        Speed
 ;
 ;25 layers      45.00      185.00      100.00
 ;25 layers      42.50      185.00      100.00
 ;25 layers      40.00      185.00      100.00
 ;25 layers      37.50      185.00      100.00
 ;25 layers      35.00      185.00      100.00
 ;25 layers      32.50      185.00      100.00
 ;25 layers      30.00      185.00      100.00
 ;25 layers      27.50      185.00      100.00
 ;25 layers      25.00      185.00      100.00
 ;25 layers      22.50      185.00      100.00
 ;25 layers      20.00      185.00      100.00
 ;25 layers      17.50      185.00      100.00
 ;25 layers      15.00      185.00      100.00
 ;25 layers      12.50      185.00      100.00
 ;25 layers      10.00      185.00      100.00
 ;
 ;
 ;All inputs
 ;
 ;Dimension X                     255
 ;Dimension Y                     255
 ;Starting Retraction Distance    4.0
 ;Increment Retraction            0.25
 ;Start Retraction Speed          10.0
 ;Retraction Speed Increment      2.5
 ;Print Speed                     40.0
 ;Starting Temp                   185
 ;Increment Temp                  0
 ;Bed Temp                        50
 ;Fan Speed                       100
 ;Fan Speed Increment             0
 ;Nozzle Diameter                 0.4
 ;Layer Height                    0.2
 ;Filament Diameter               1.75
 ;Extrusion Multiplier            1.0
 ;Layers Per Test                 25.0
 ;Number of Tests                 15.0
 ;
 ;
 ;Start Gcode
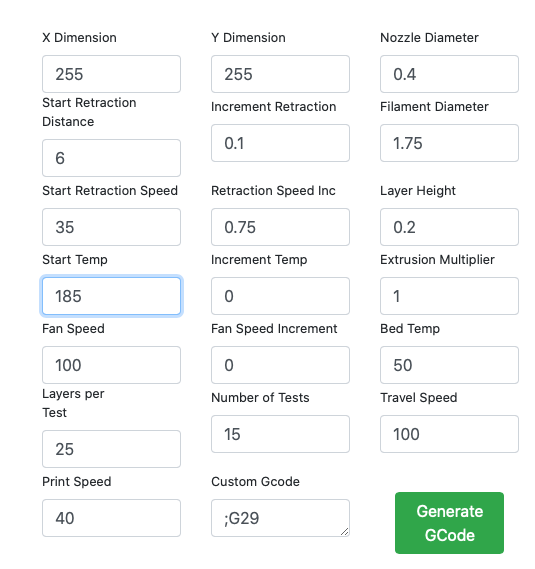
Using the website again, I honed in on the settings as follows: –
Having run the new code through the printer, resulted in a much smoother tower : –
Your calibration tower looks great and no evidence of stringing, what next? One word…
Benchy
Benchy is the popular 3D Print Calibration and Torture Test, it’s basically small boat that’s printed without supports and used as a bench mark across many different types of printers to determine how well it’s performing. It does push limits on overhang and thin parts to deal with. I sliced this using 0.2mm layers which resulted in a 90 minute print which you can see below. There’s minimal stringing which is dealt with a cigarette lighter or hair dryer. It’s not perfect, but is better than most first time prints.
The creators behind Benchy provide full instructions and detailed measurement sheet to enable you to compare your print with callipers to that which was expected.

Ever wanted to see Benchy printed close up? take a look at this :-
The current record for printing Benchy is around 14 Minutes, with this expert pushing their printer to the limits.


I don’t get the sense of the test or the sense of the two models you posted. I mean, if it is a stringing test it should have only separated vertical bar. not full walls as the second photo you posted has. How can you say the second is not stringing ? there is not a single movement requiring retraction. It is like a big empty calibration cube. Maybe I missed something. If so please explain
LikeLiked by 1 person
Hi Enrico, that’s a great question, and you’re right in the fact it is a follow calibration cube. The end result we’re looking for are smooth walls, a small notch on each section of the test, and the corners have a small loop, the biggest loop is the first corner.
If we take the first example I posted, You can see that the base mesh was printed correctly, but each tower is stringy and messy, using the parameters I provided on a Bowden tube setup (Retraction distances are smaller on direct drive printers), working from the first corner (Large Loop) going anti-clockwise, each “Tower’s” retraction distance started at 4.00mm working up in 0.25mm so by the time we get completely round the cube we have 7.5mm retraction distance.
Then for each layer section of the test (which is 25 layers) the retraction speed starts at 10mm/s working up to 45mm/s at the top of the cube.
Once that first print is done, you’re looking for a section that has the best wall (no gaps), this then gives you the Retraction Speed and retraction distance most likely to work well with your filament.
Hence the second print which resulted in a hollow cube, with walls and sections clearly defined without stringing, resulting in a smooth and consisted print.
You can use the same weblink to print a temperature tower too, to enable you work out which gives the best print without string for the filament you’re using and as I’ve found out even the same manufacture can have different optimal temperatures for different batches.
I’ll update the article with some improved pictures of the cube as I think this may help somewhat.
Thanks for your feedback, let me know if you have follow up questions, or where I can improve on my explanation.
Kind Regards
Jason
LikeLike